


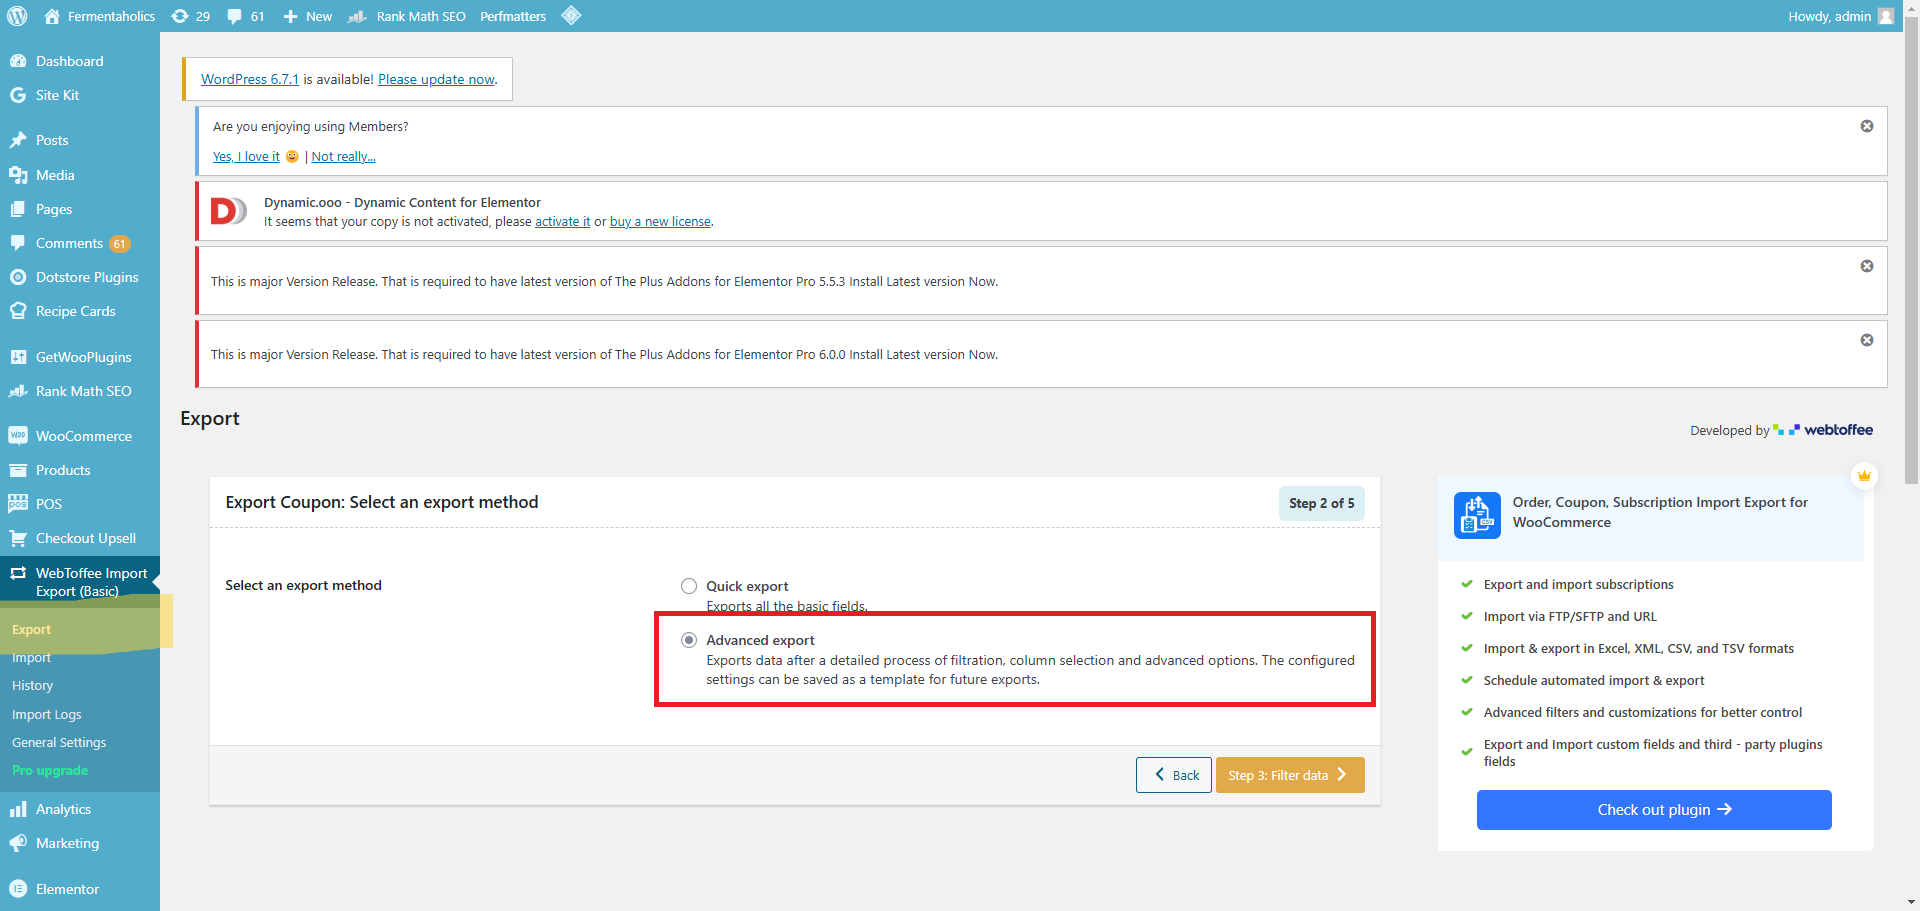
Go to webcoffee import export and select export settings. on that menu select Advance export
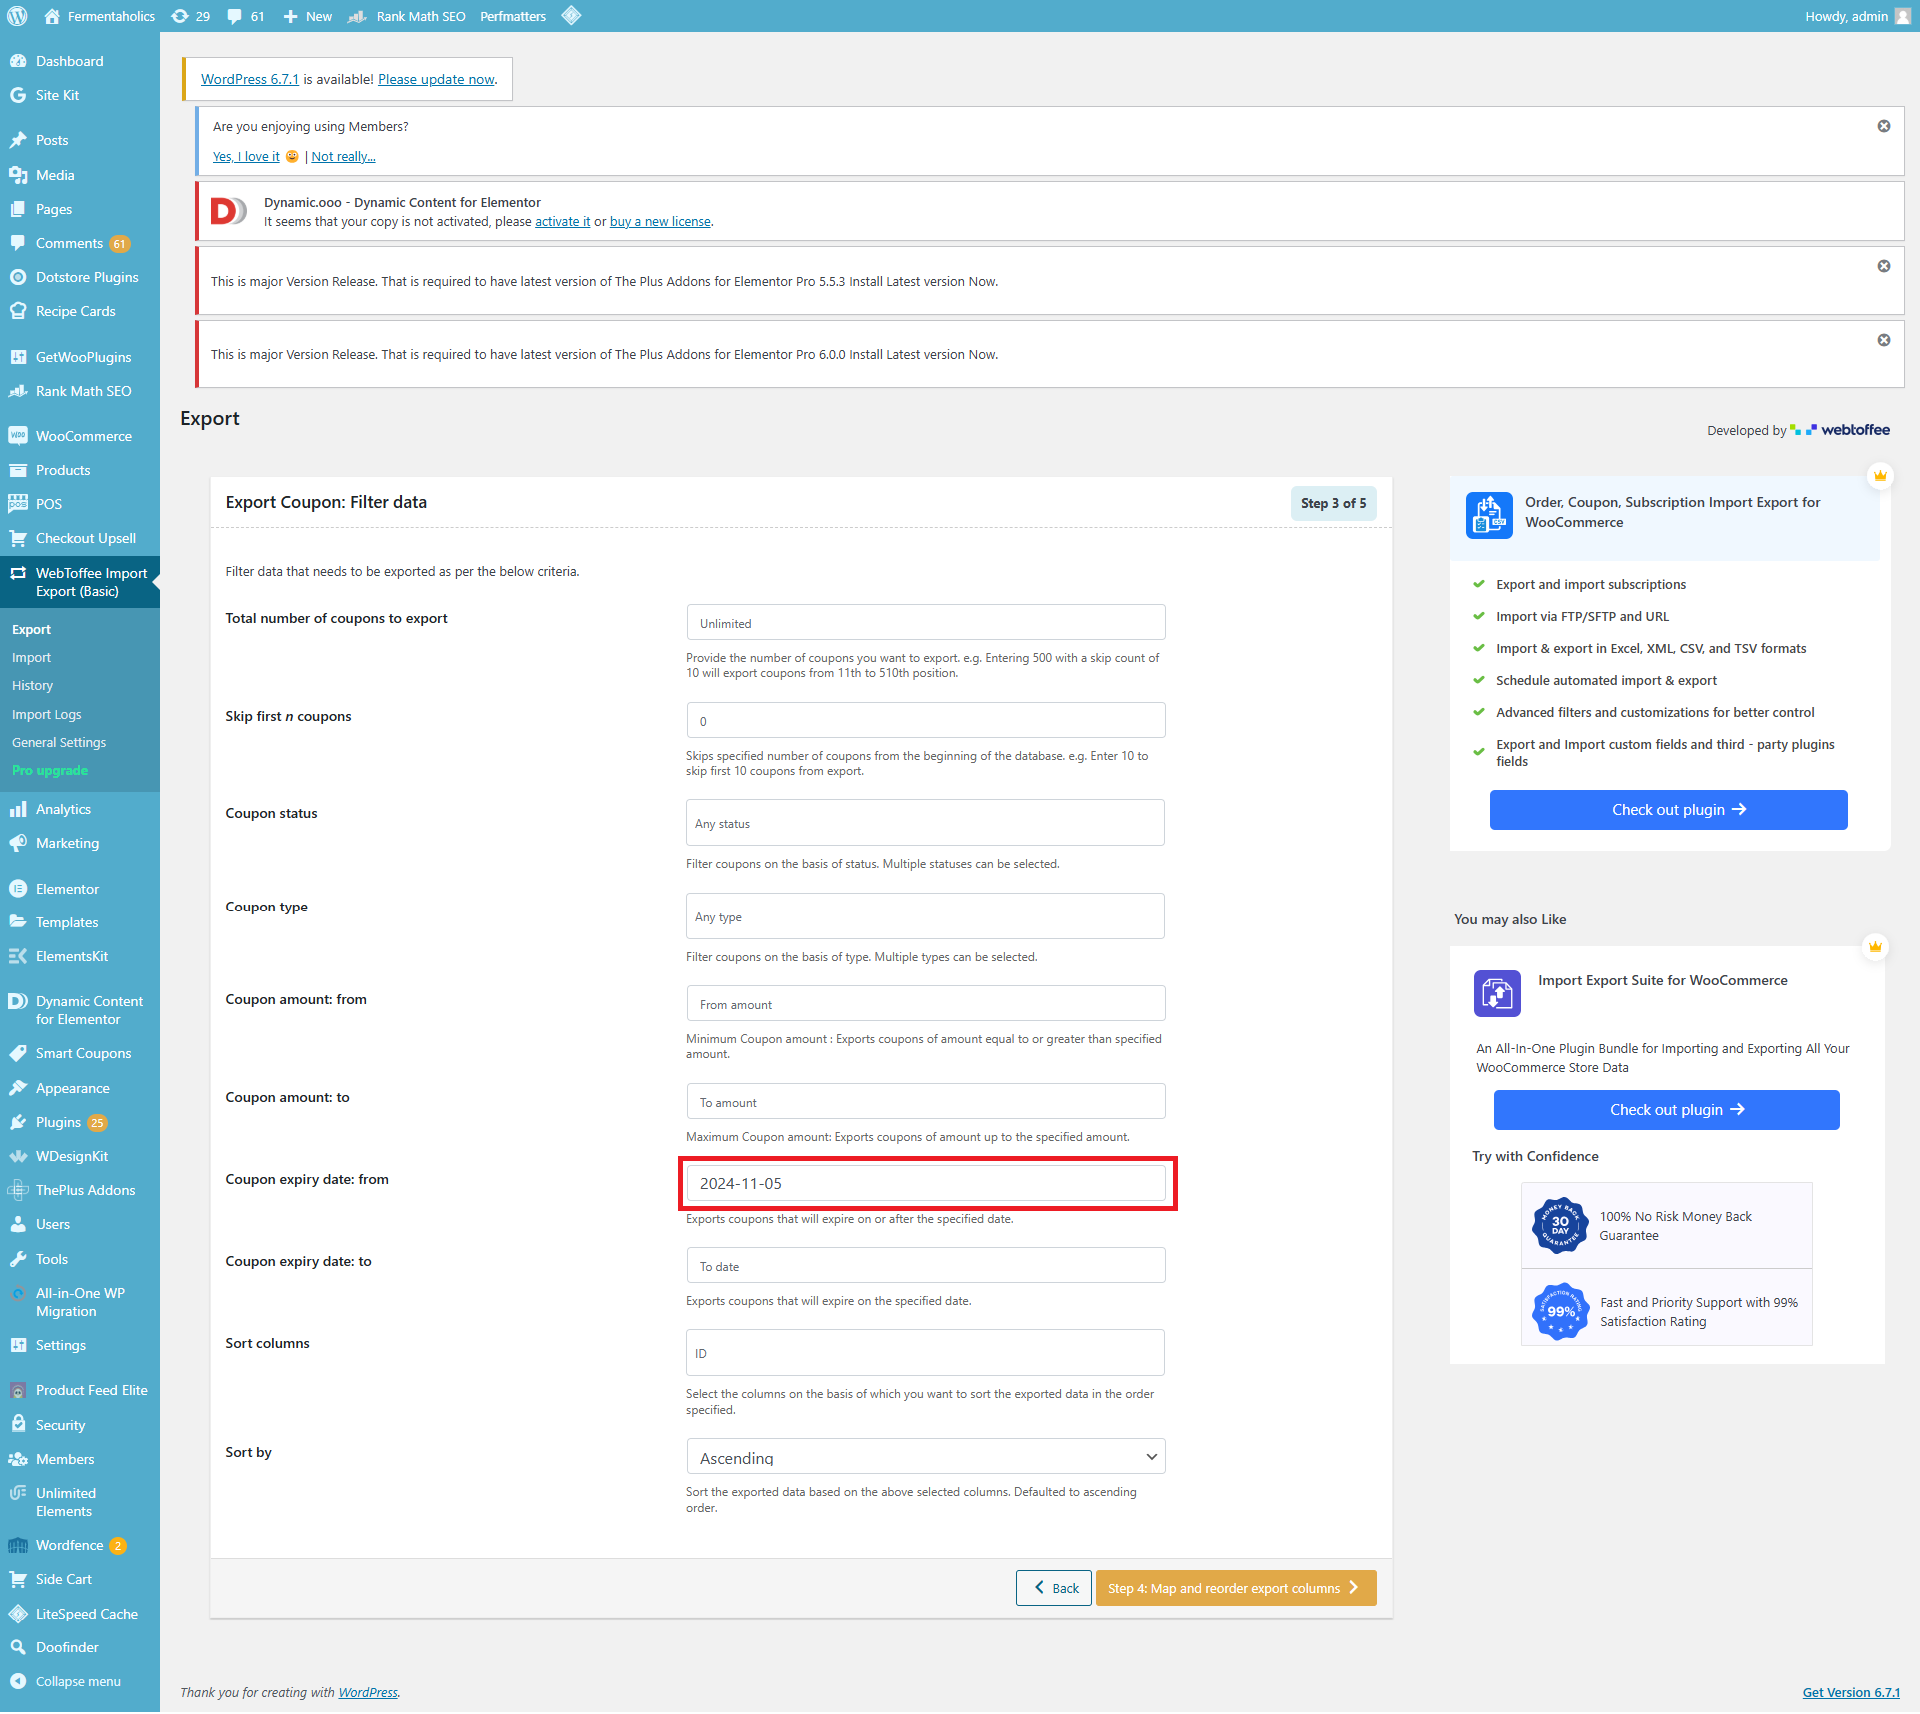
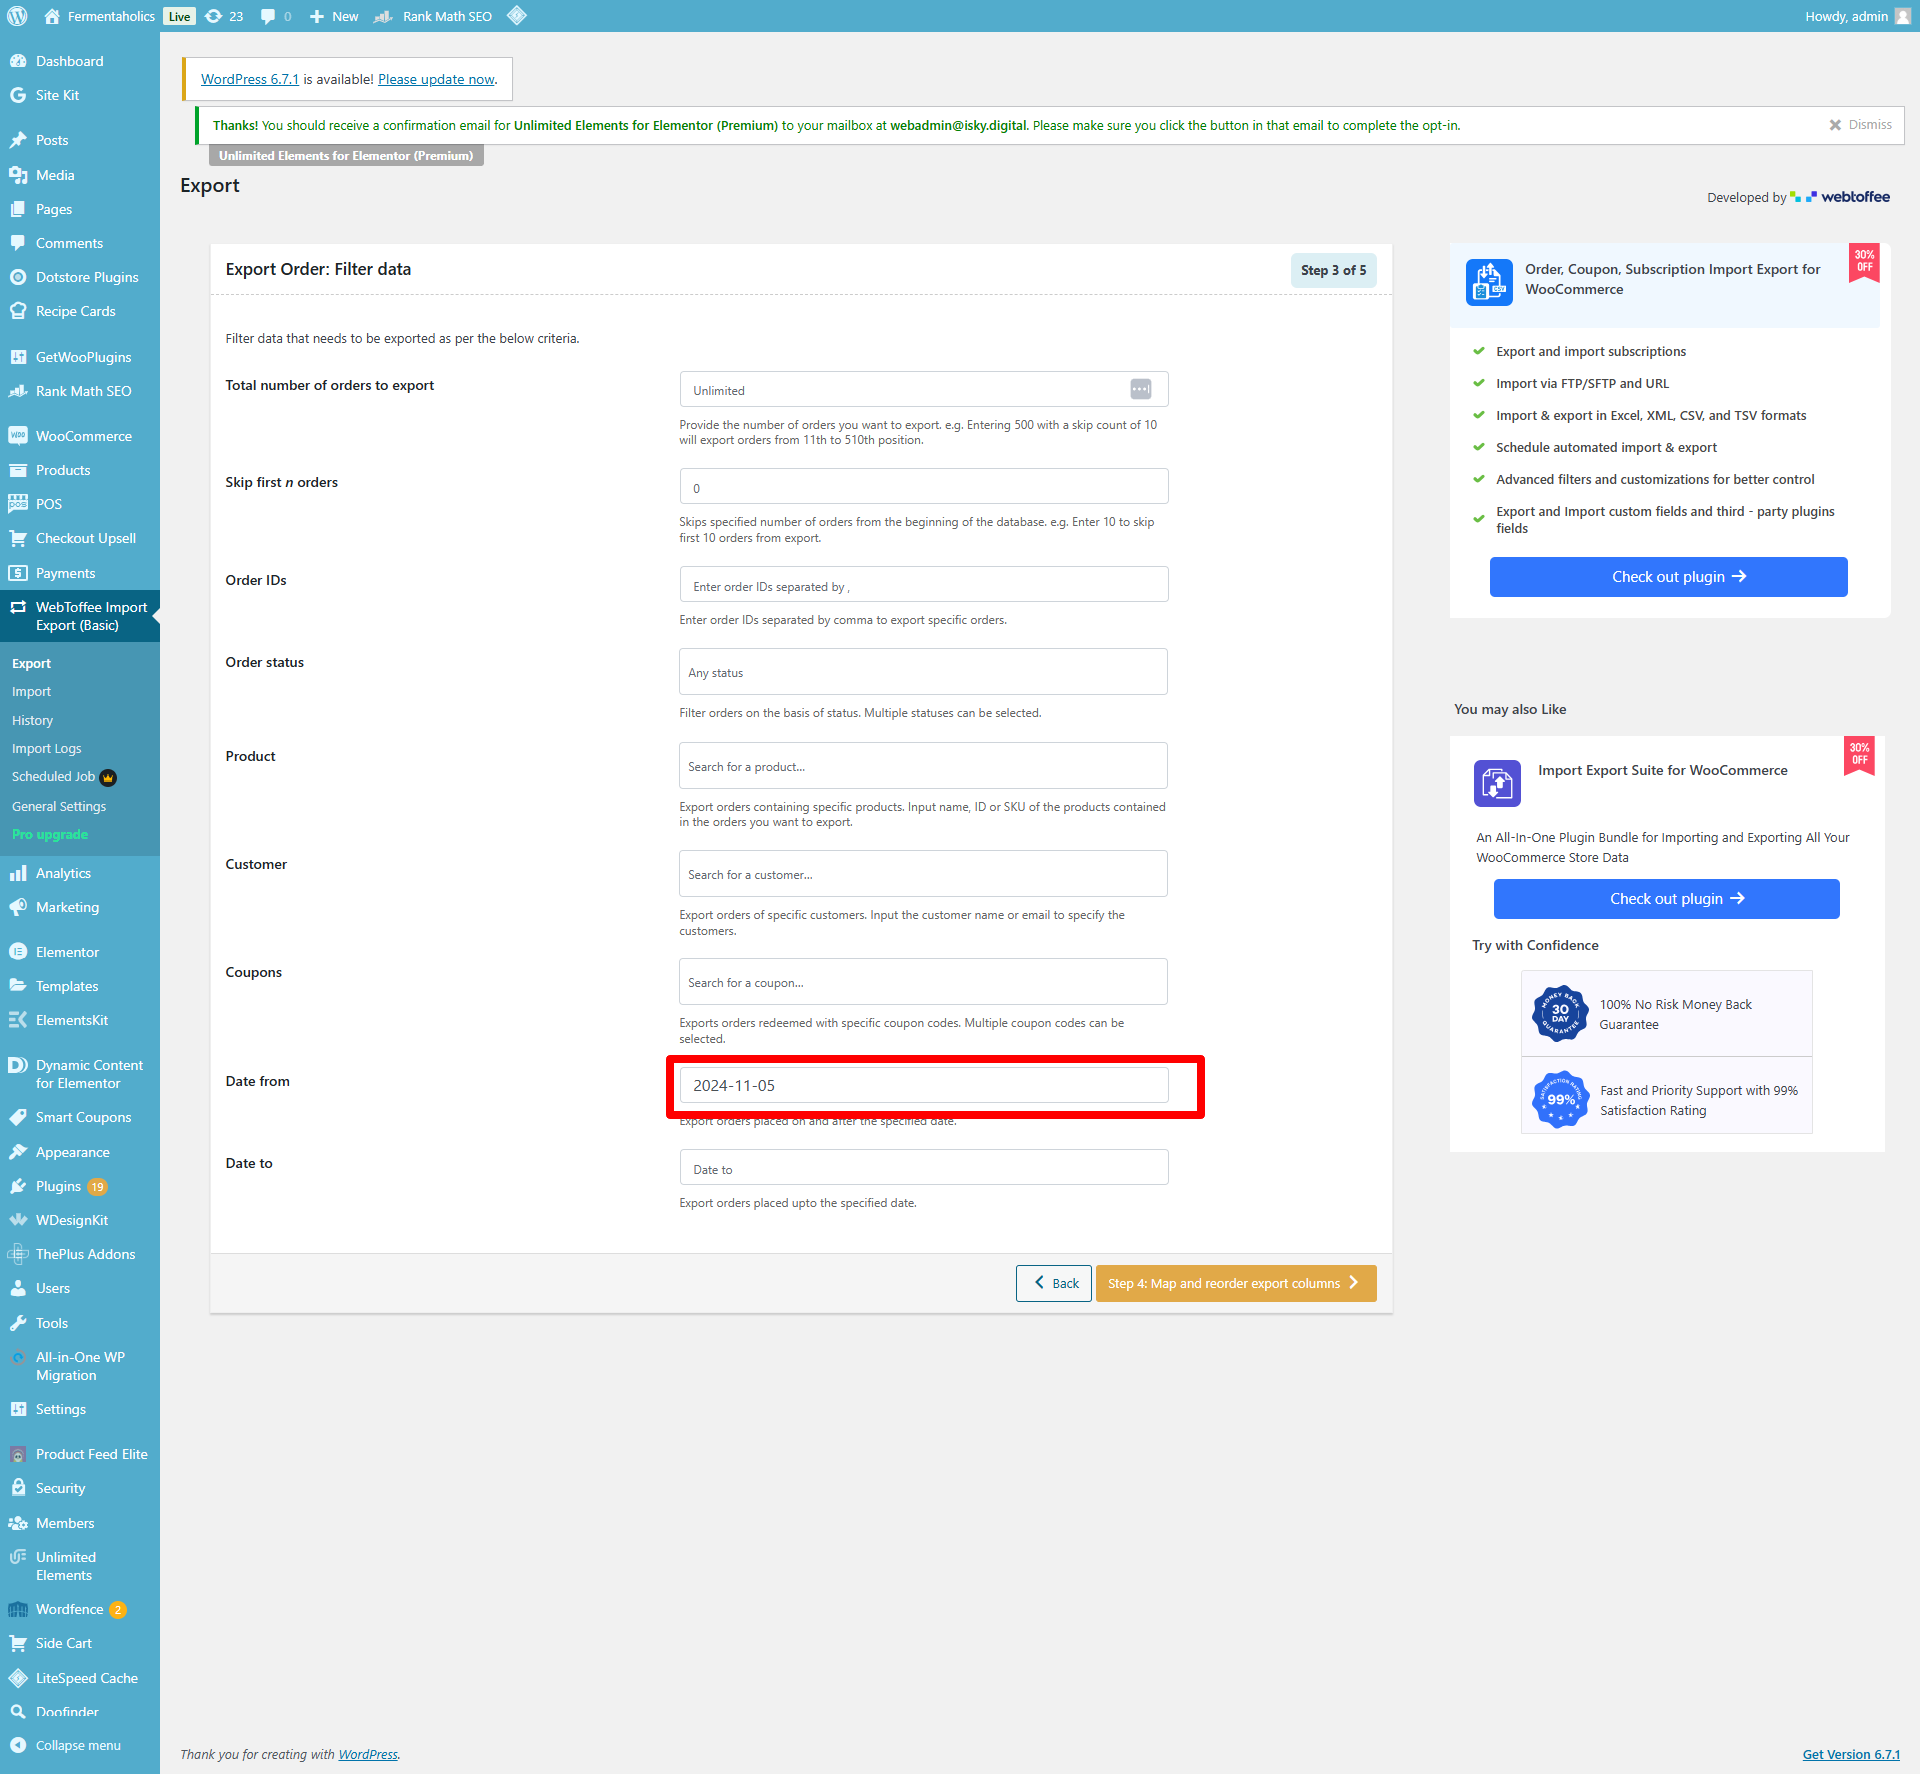
In the next step you will select the date of your last push from staging to live and enter that date and the highlighted field proceed to step four.
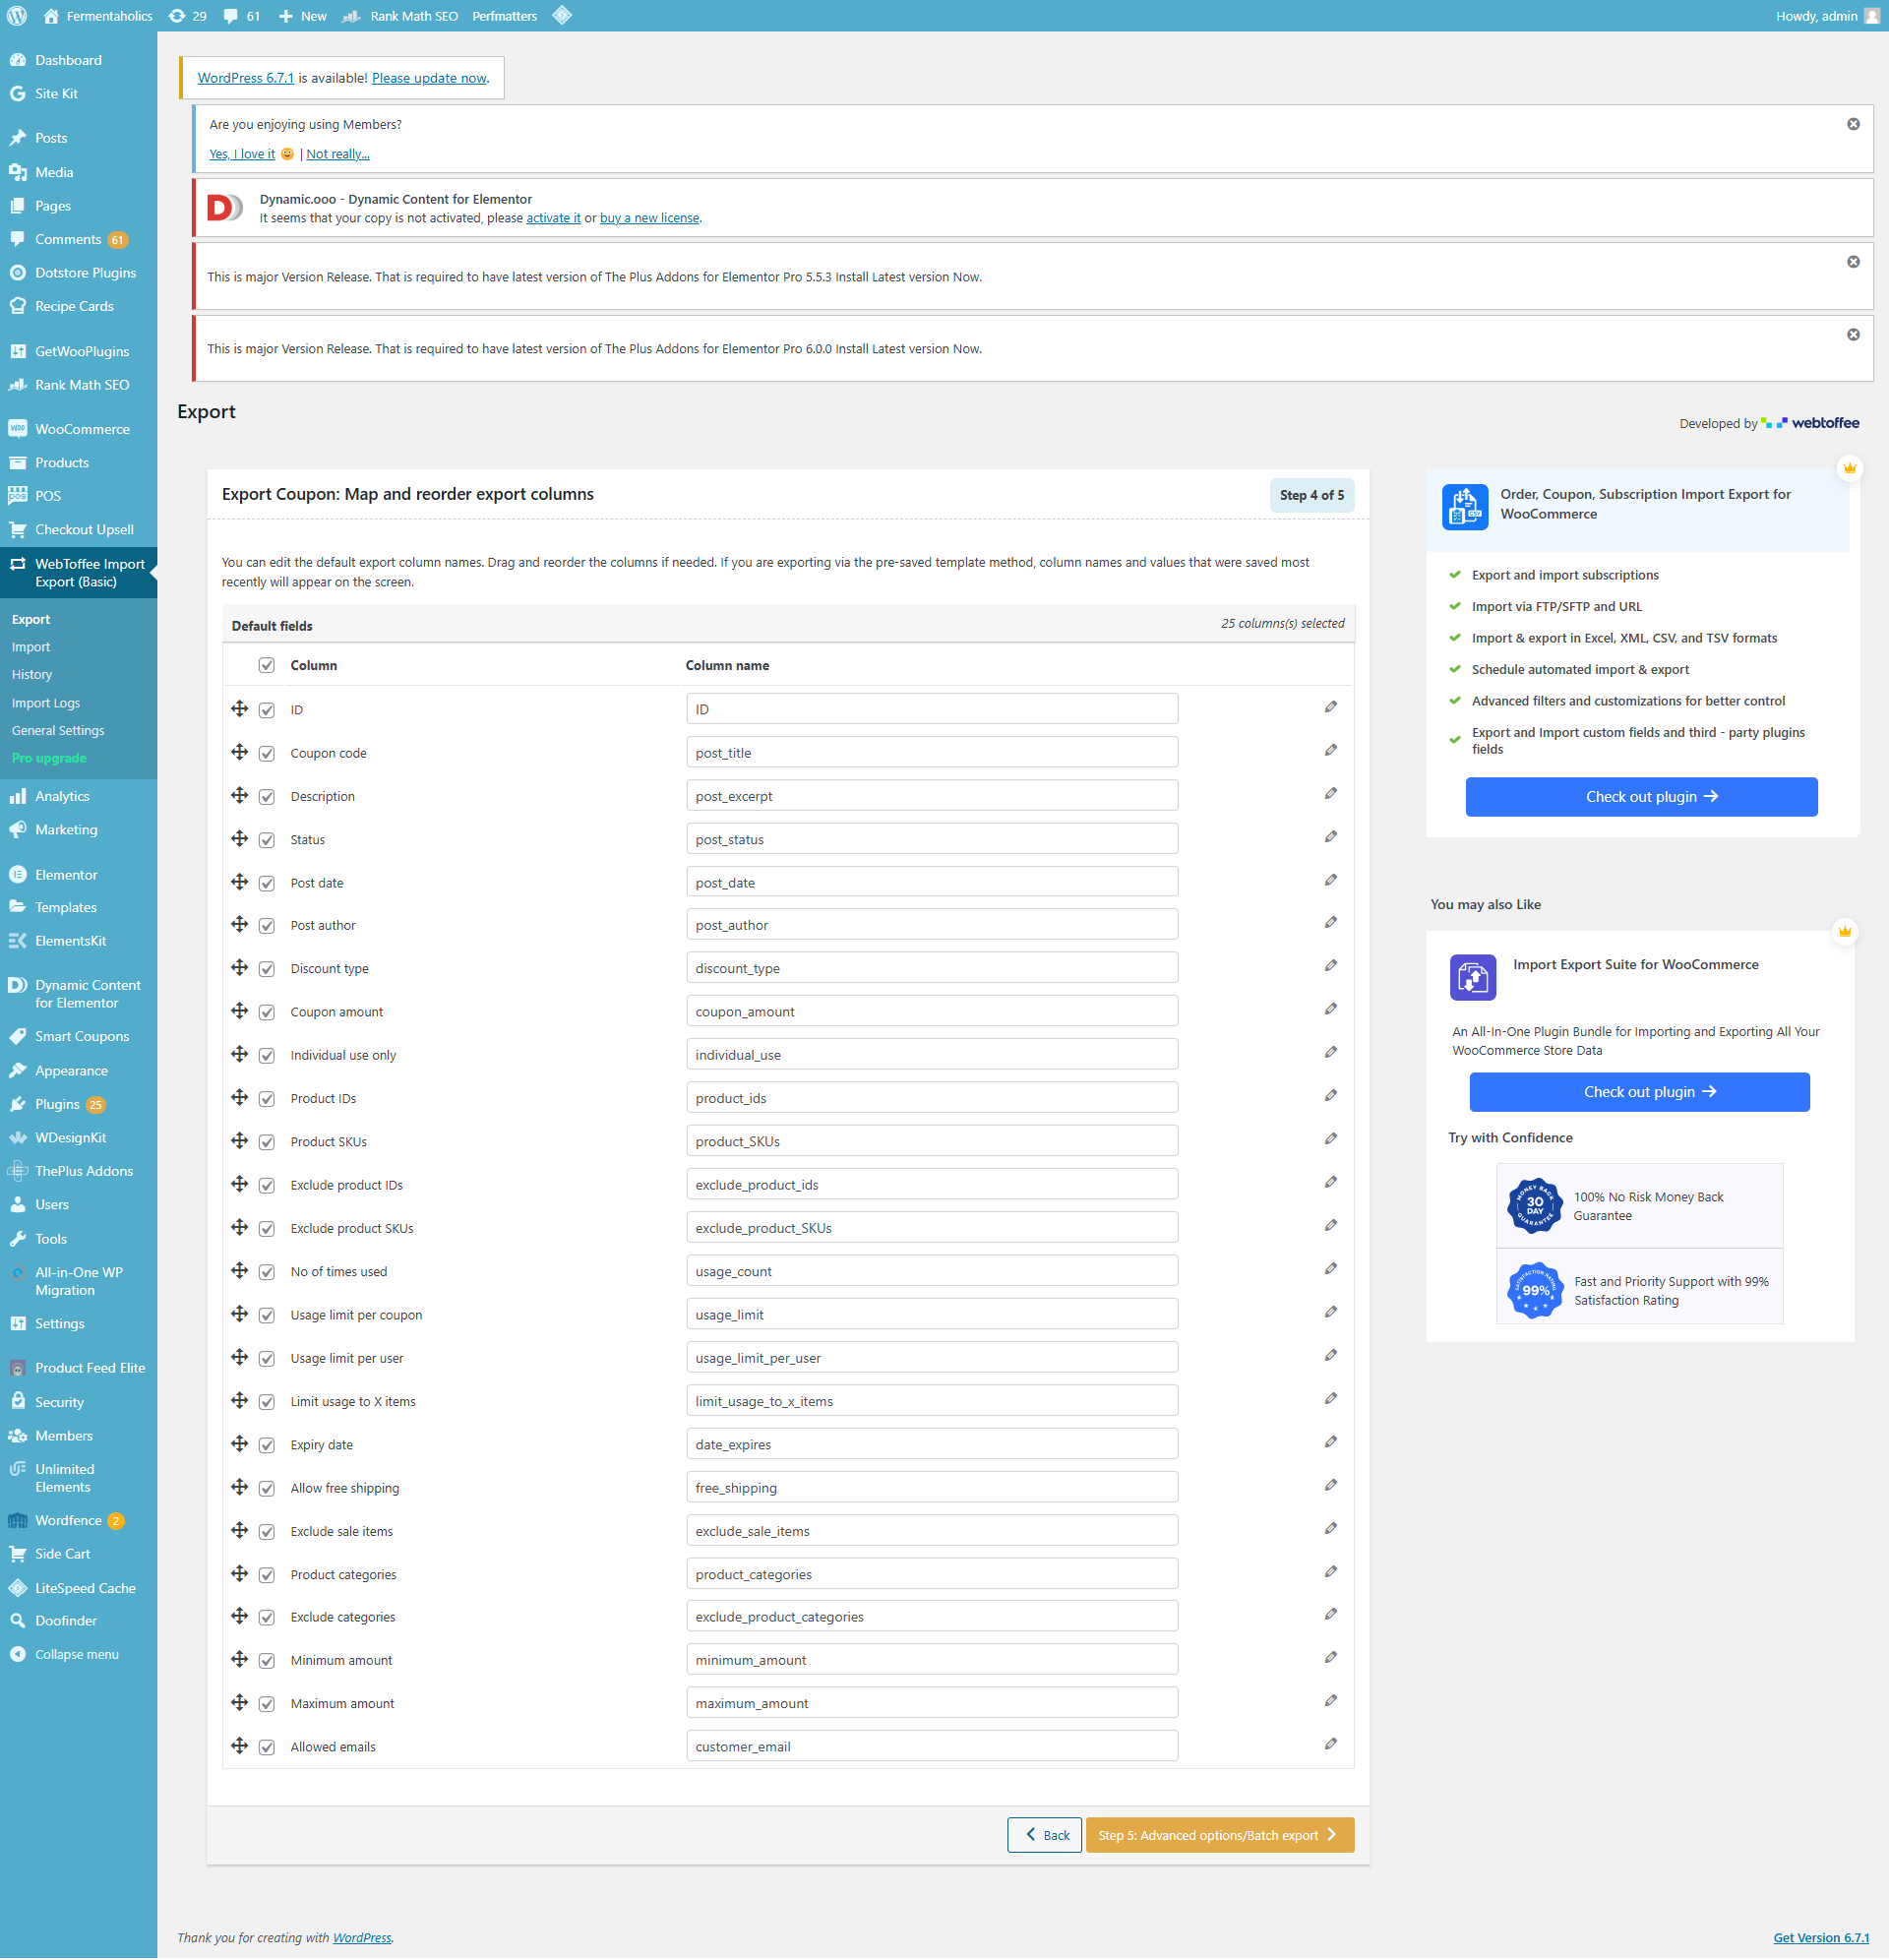
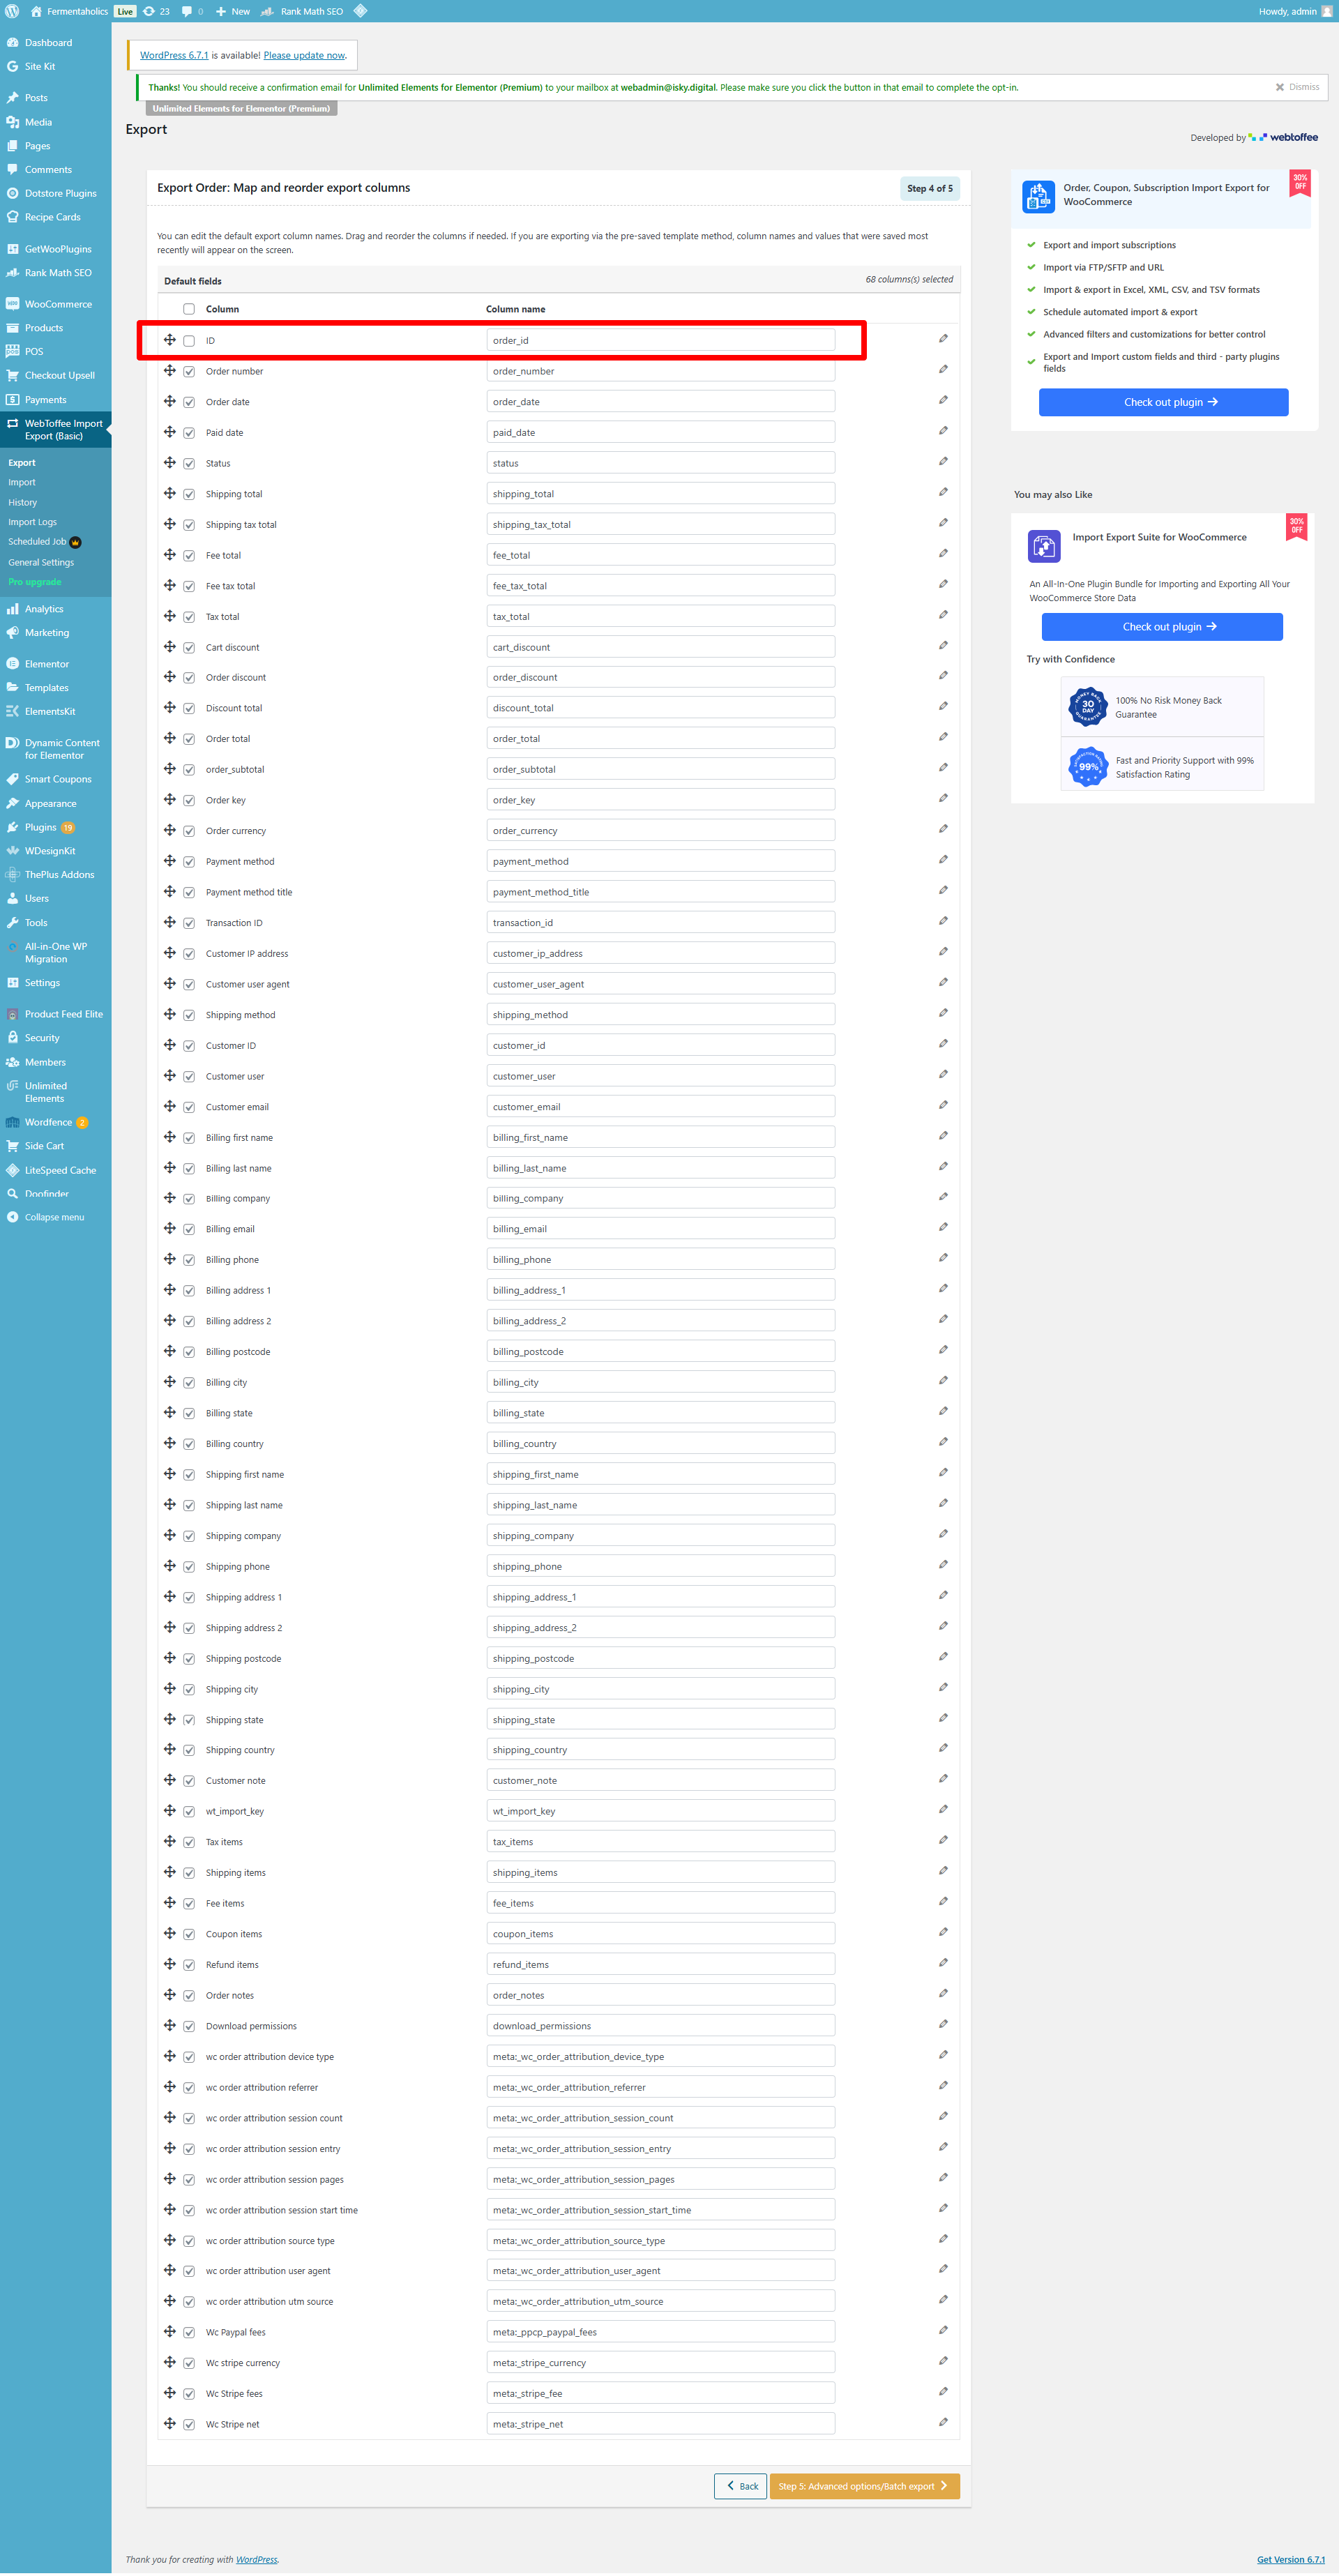
Next you don’t have to change anything on the advanced setup I just like to make sure that the fields are mapped correctly give it a quick once over and proceed to step five.
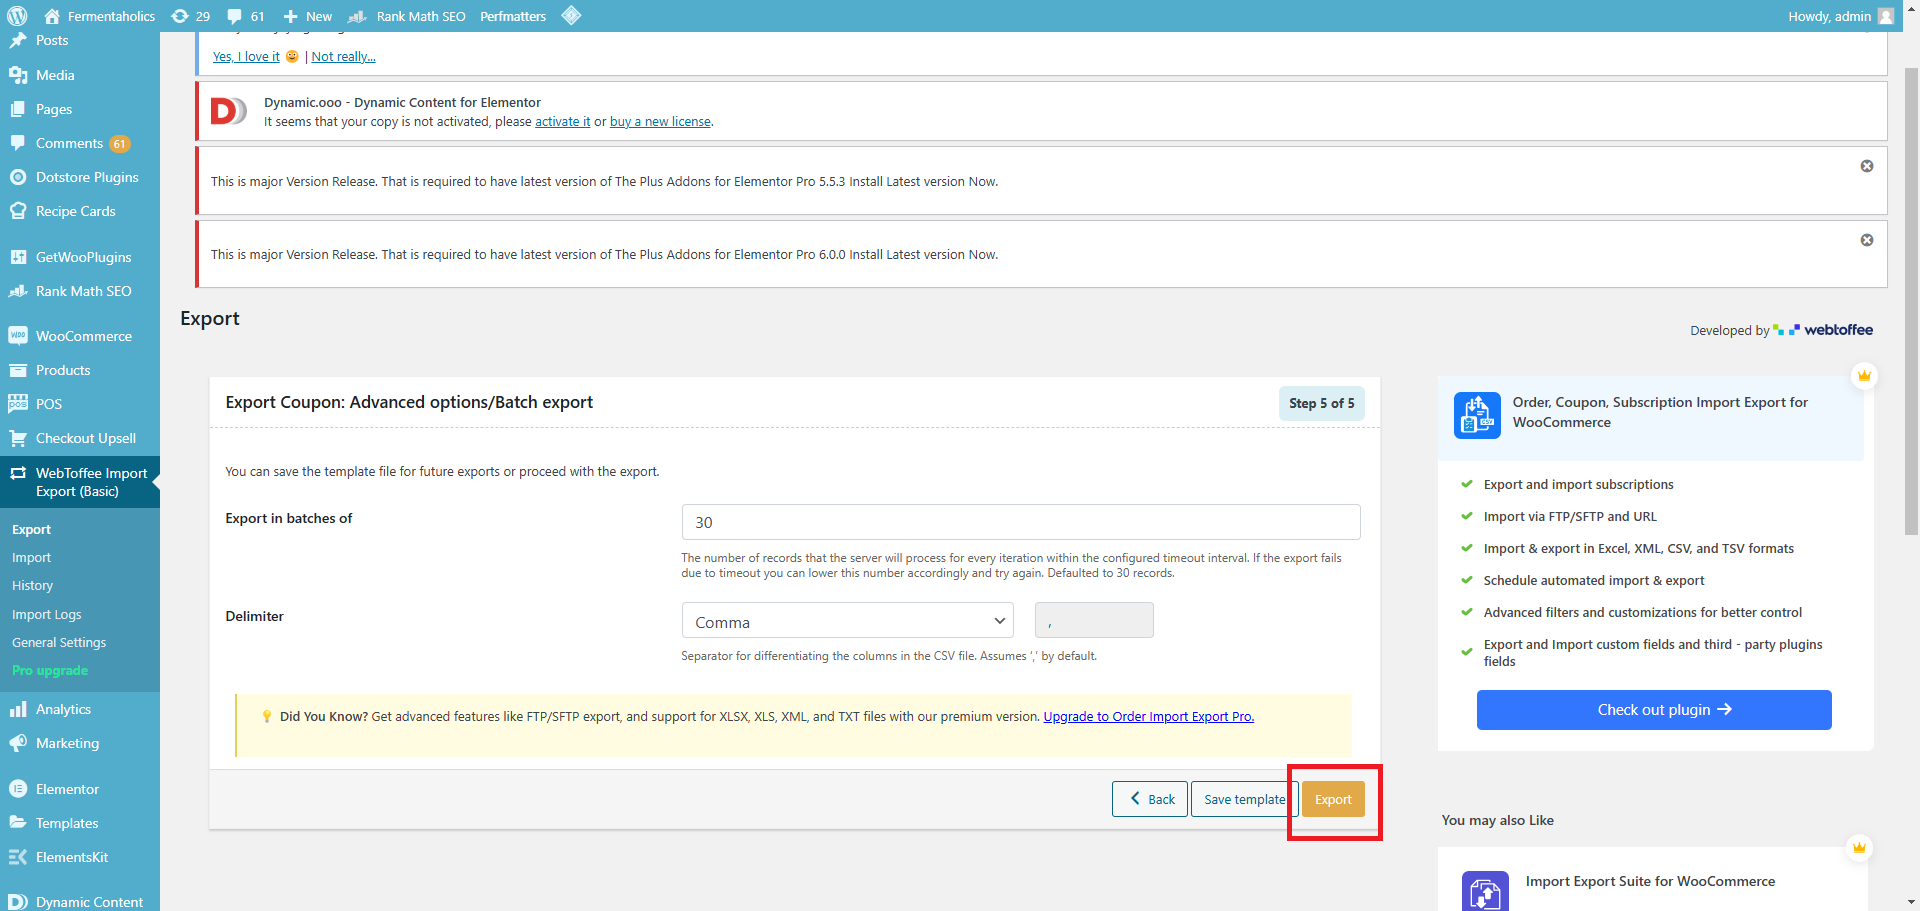
Batch export and groups of 30 is fine when it’s coupons
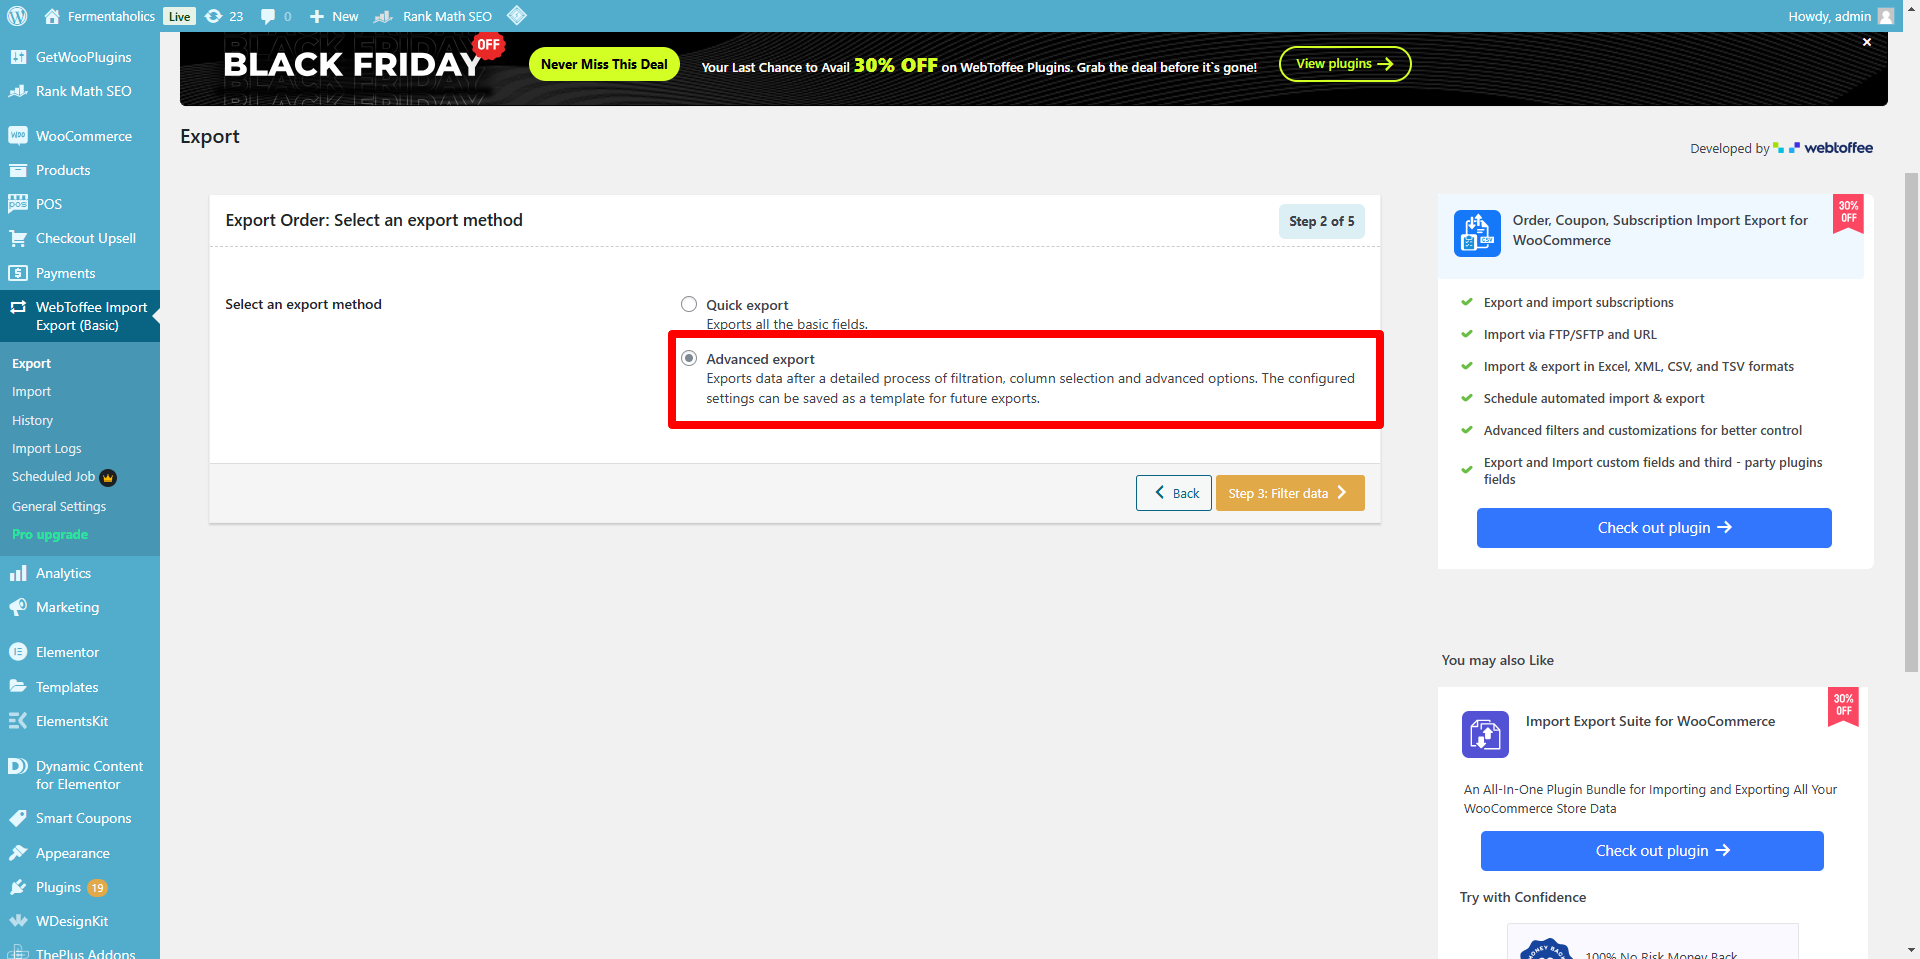
Order export you’ll go to export advanced settings and proceed to step two and
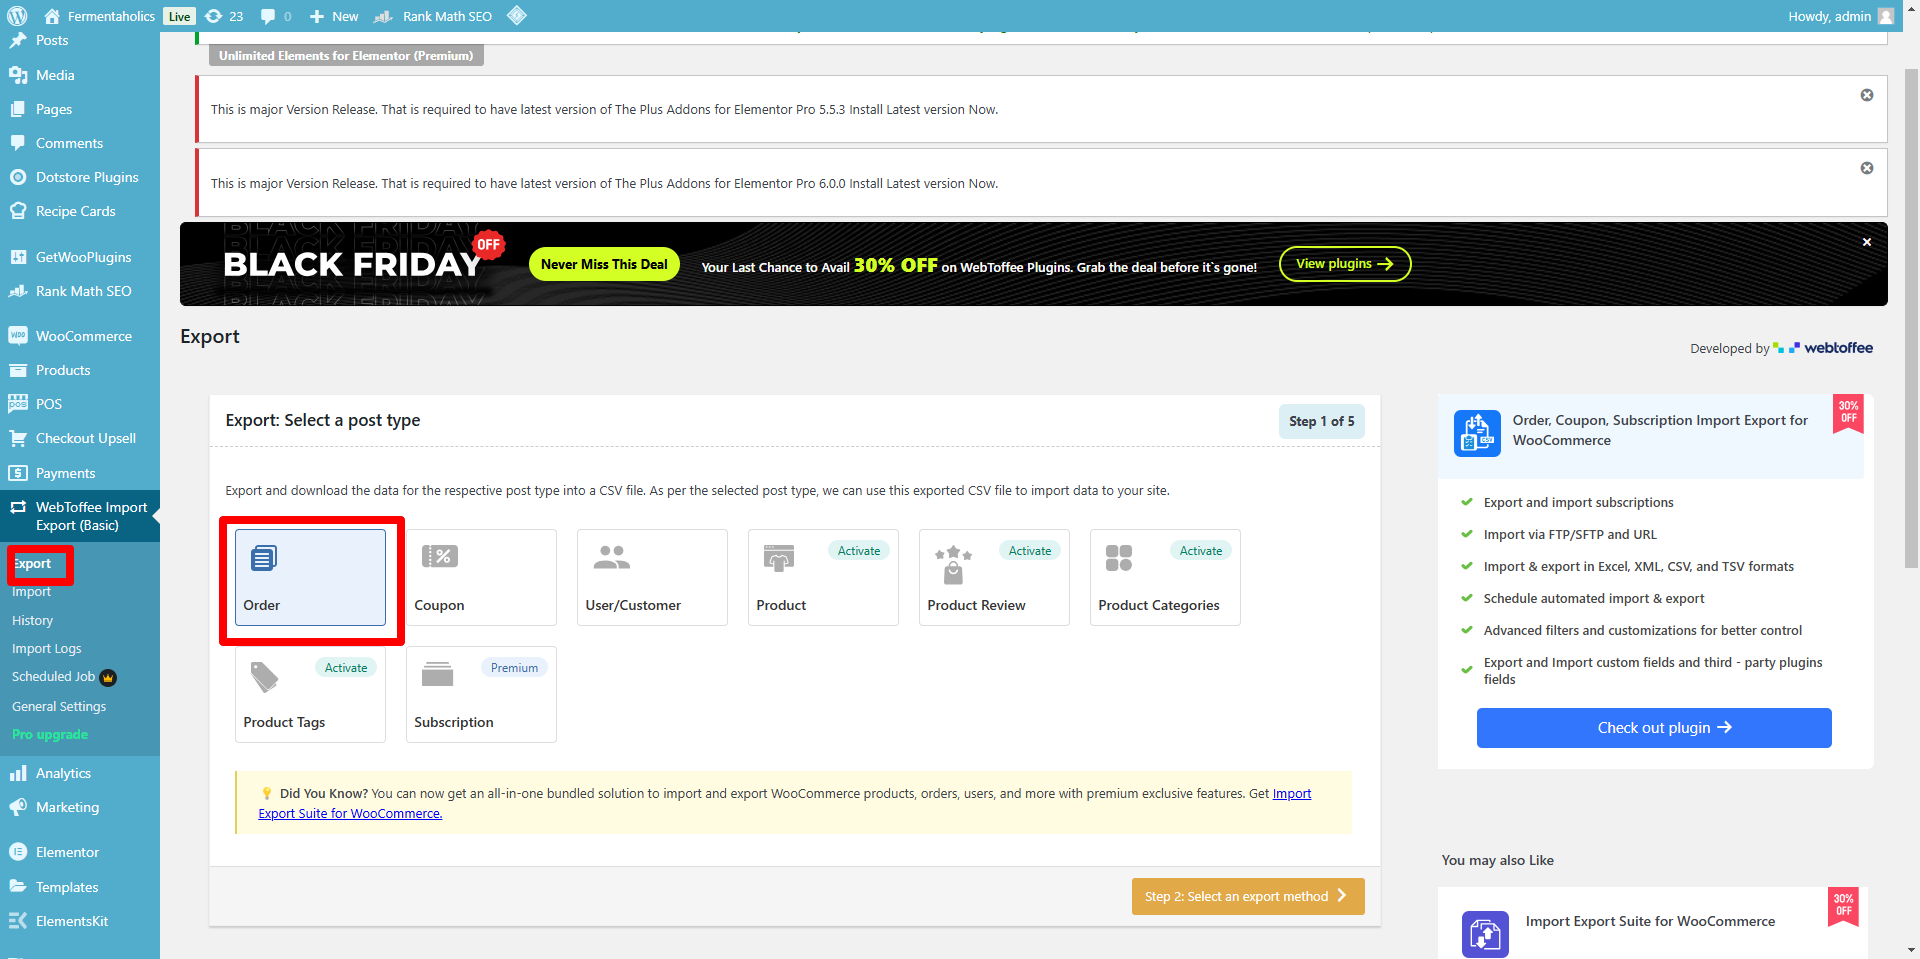
select advanced export
And step three we will select date from date from we will put the date of the last push from staging to live how you identify this is the last date of the order in the staging site okay that’s the date that we want to put in this field and that’s going to minimize a lot of problems and save you a lot of time if you get this one step correctly
Now this step is critical you have to deselect the column ID and Order ID because if you don’t do this it’s going to cause errors importing on the staging site because the order IDs will never match up and that’s relative to the way the database is configured in WordPress. proceed to the next step
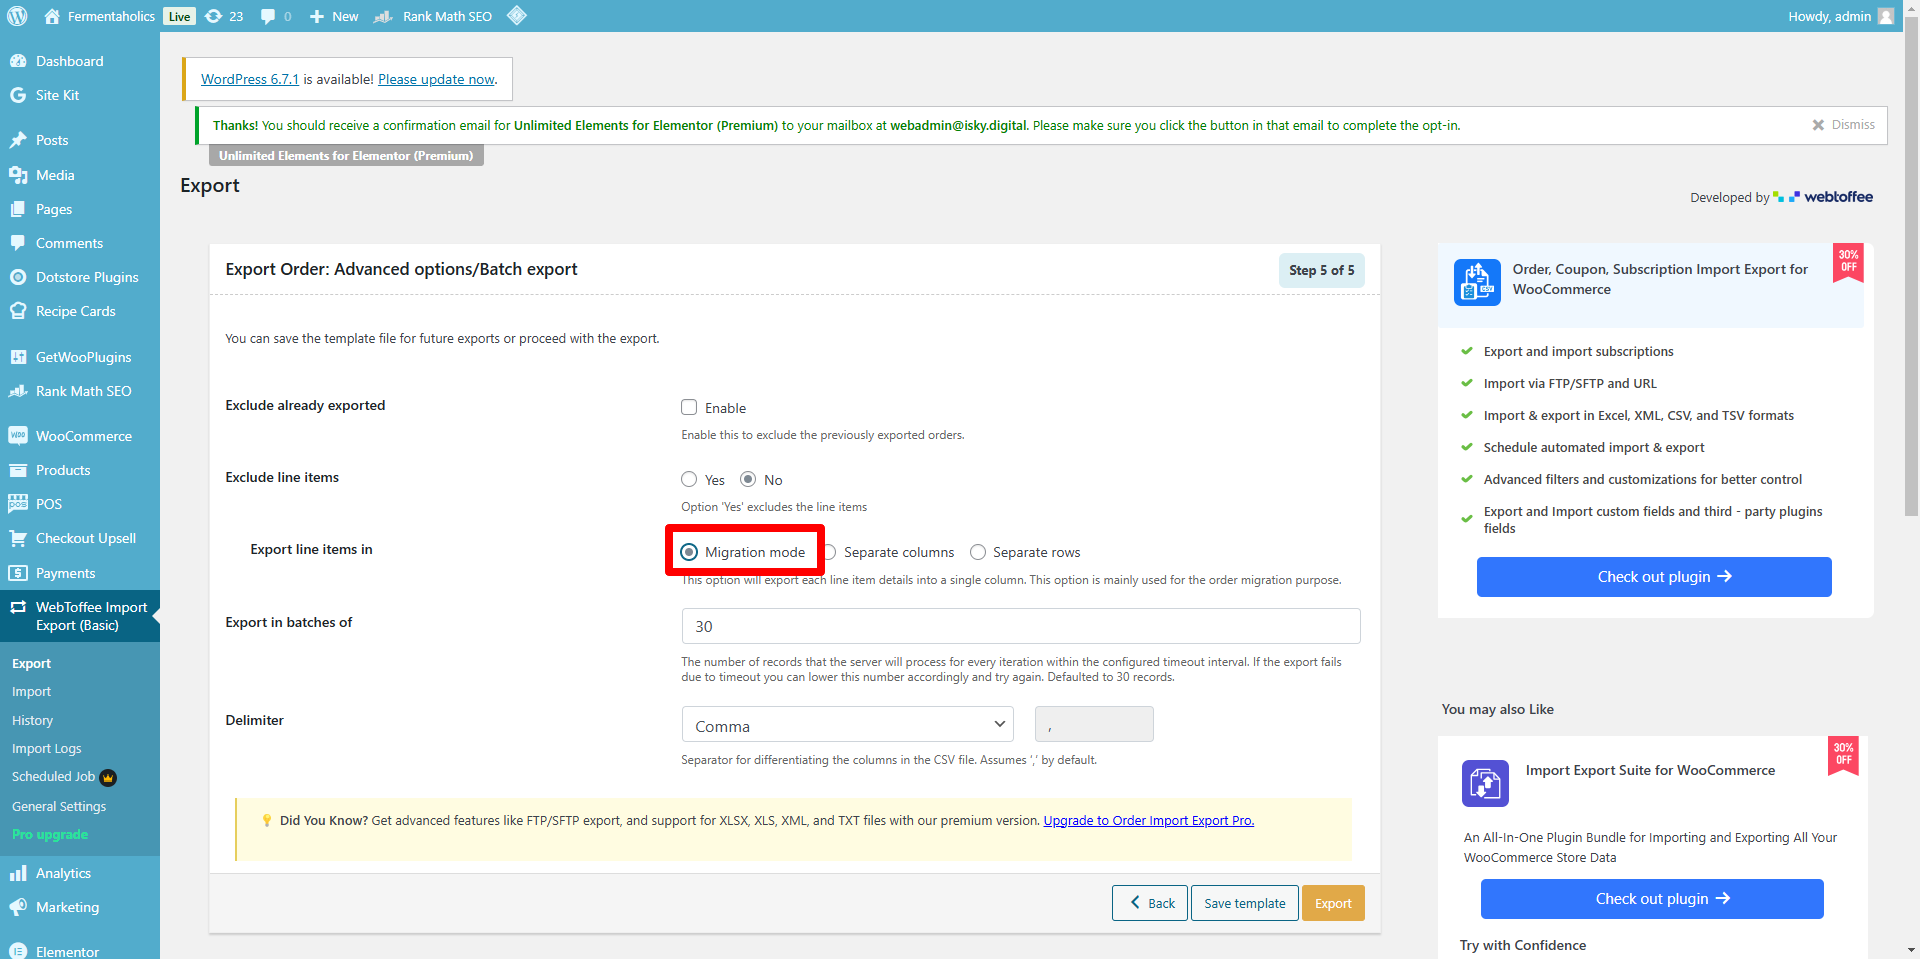
Here at the finalization of the export you want to not exclude line items and esport in migration mode you can export in batches of 30 that’s fine there’s no problem on the export I just choose a lower number on the import side and I’ll explain that later
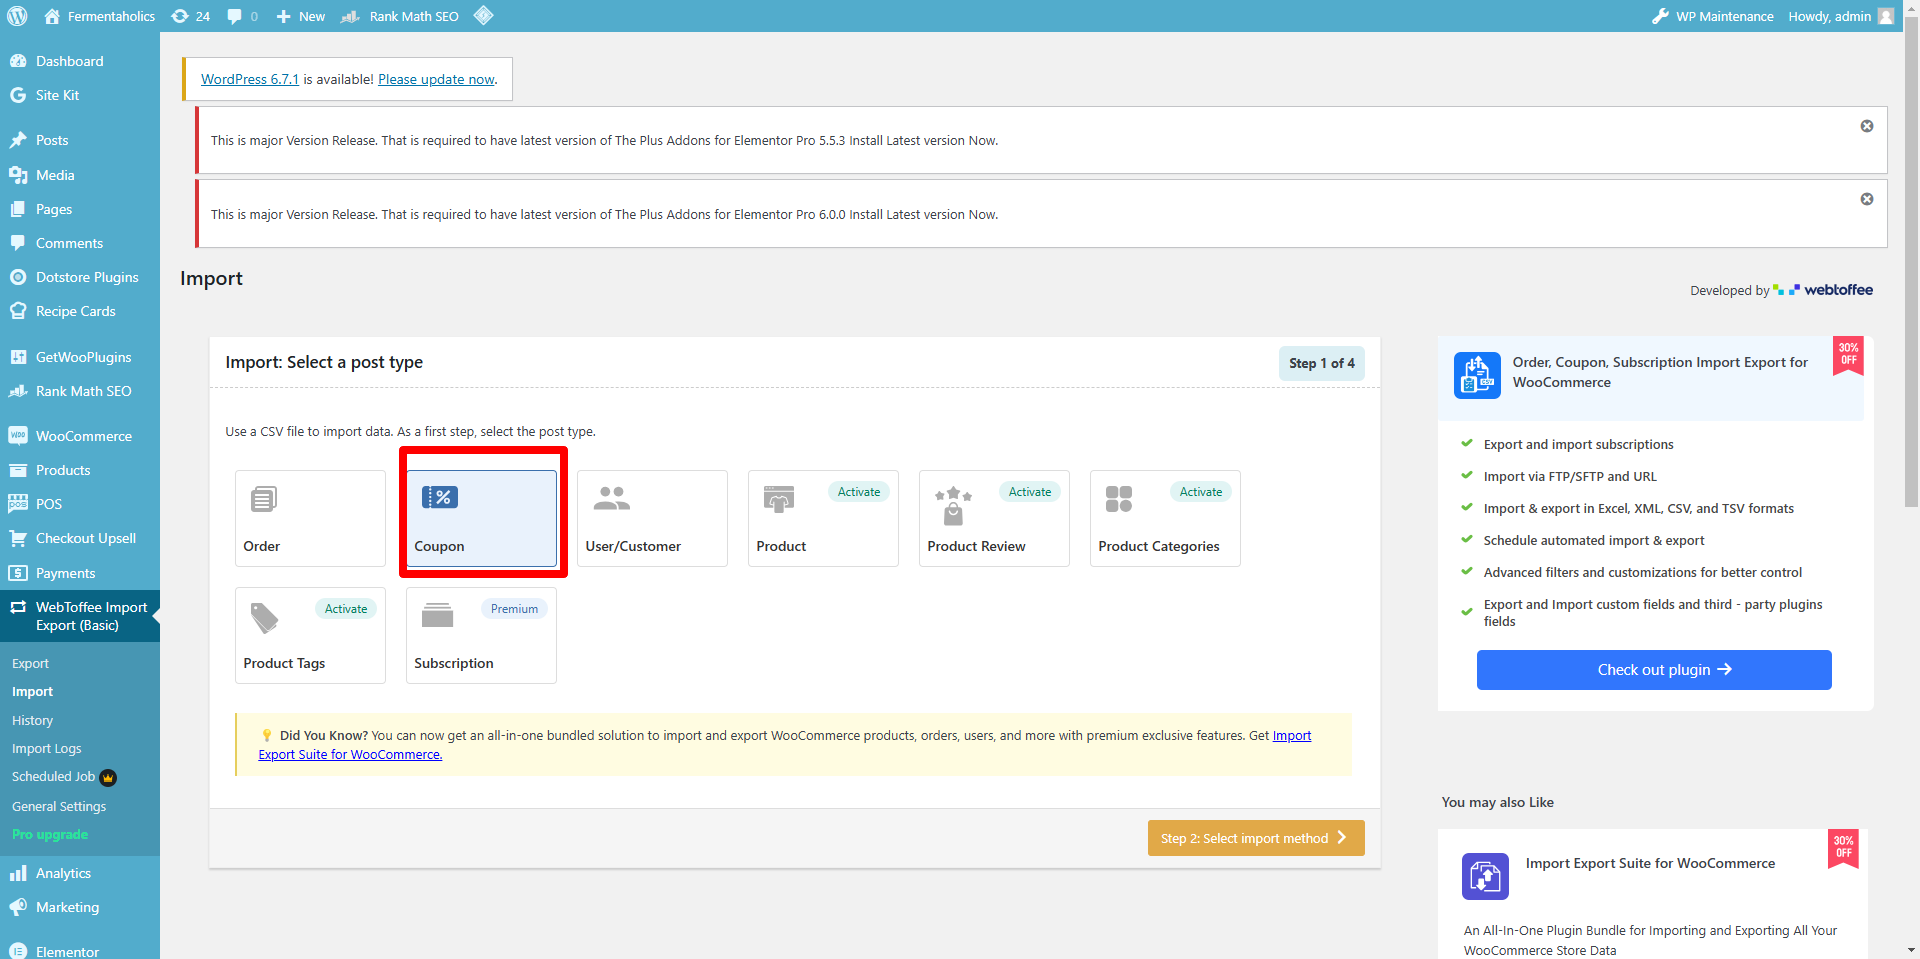
Import coupons on the staging site you going to go to import Select coupons proceed to the next step.
This step is pretty straightforward you just want to make sure that the columns match up sometimes imports and exports there can be exporting issues it’s not perfect that’s why I’m saying to just make sure and check
Lorem ipsum dolor sit amet, consectetur adipiscing elit. Ut elit tellus, luctus nec ullamcorper mattis, pulvinar dapibus leo.

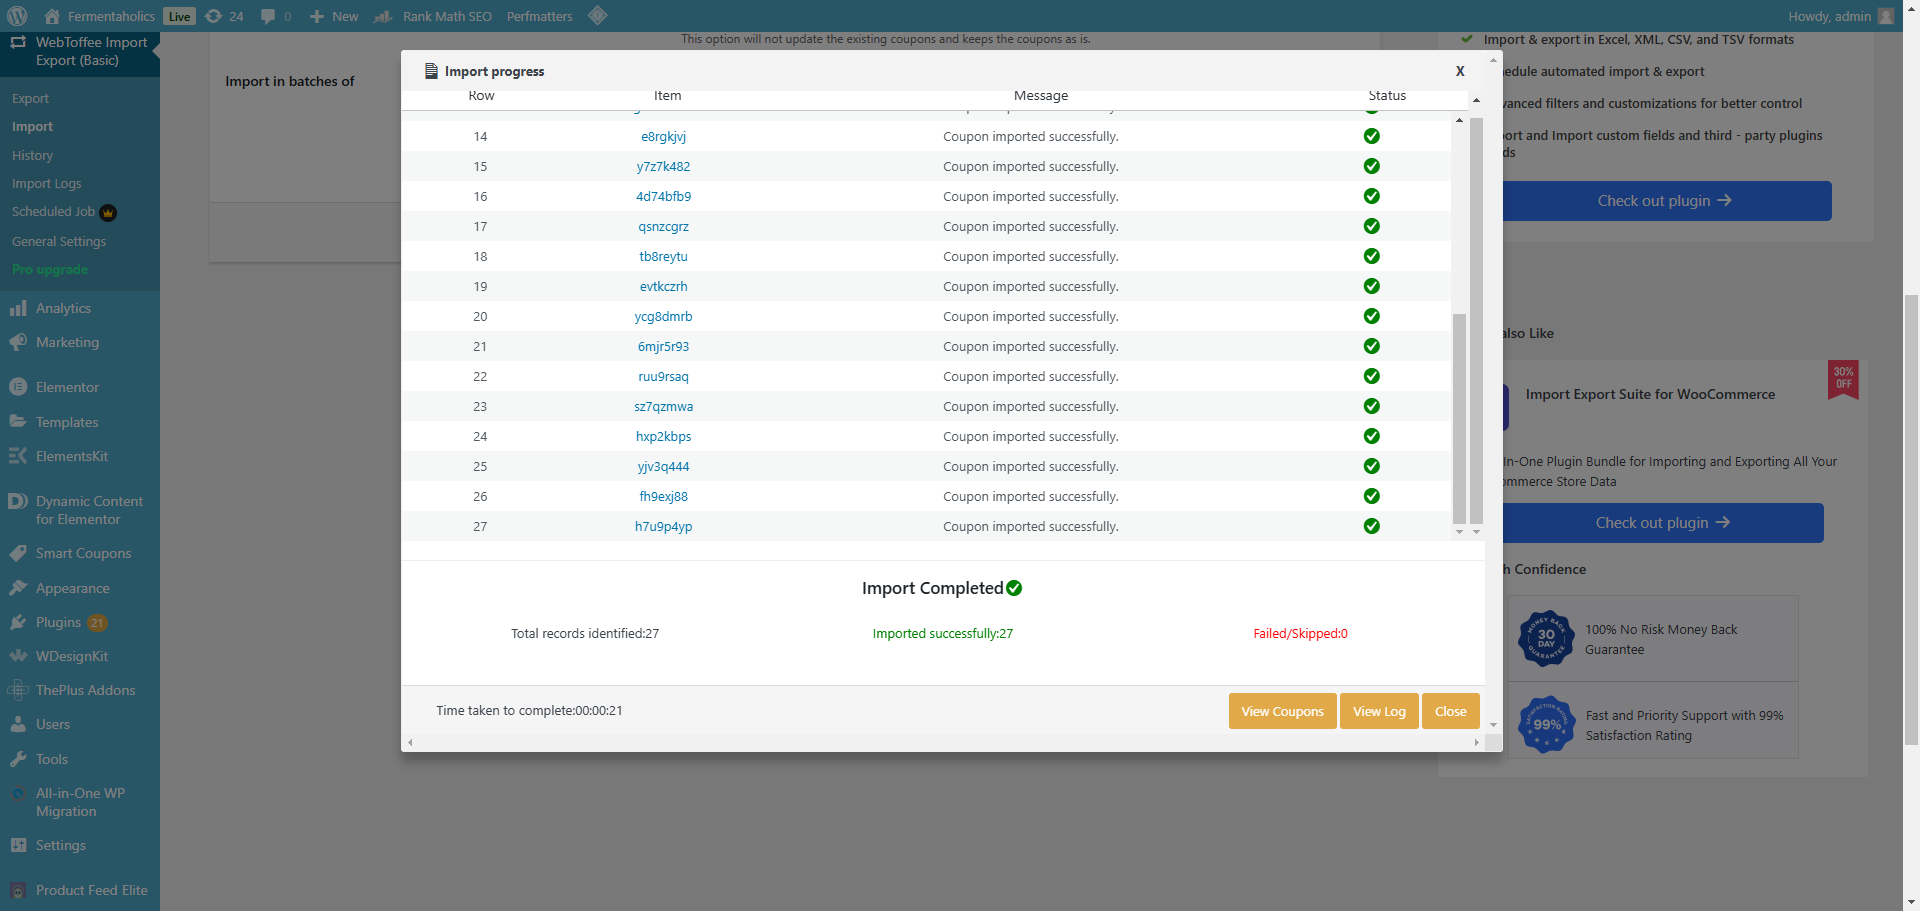
Upon import if you’re a coupons imported correctly you have zero errors and you have updated the coupons that were created from the last push from staging to live copied from live to staging for the next push back to live
Importing orders is where most of the errors occur and this is probably the most important part that you’ve got to pay attention to and be the most delicate with so here are the steps in order to make sure that the import goes well
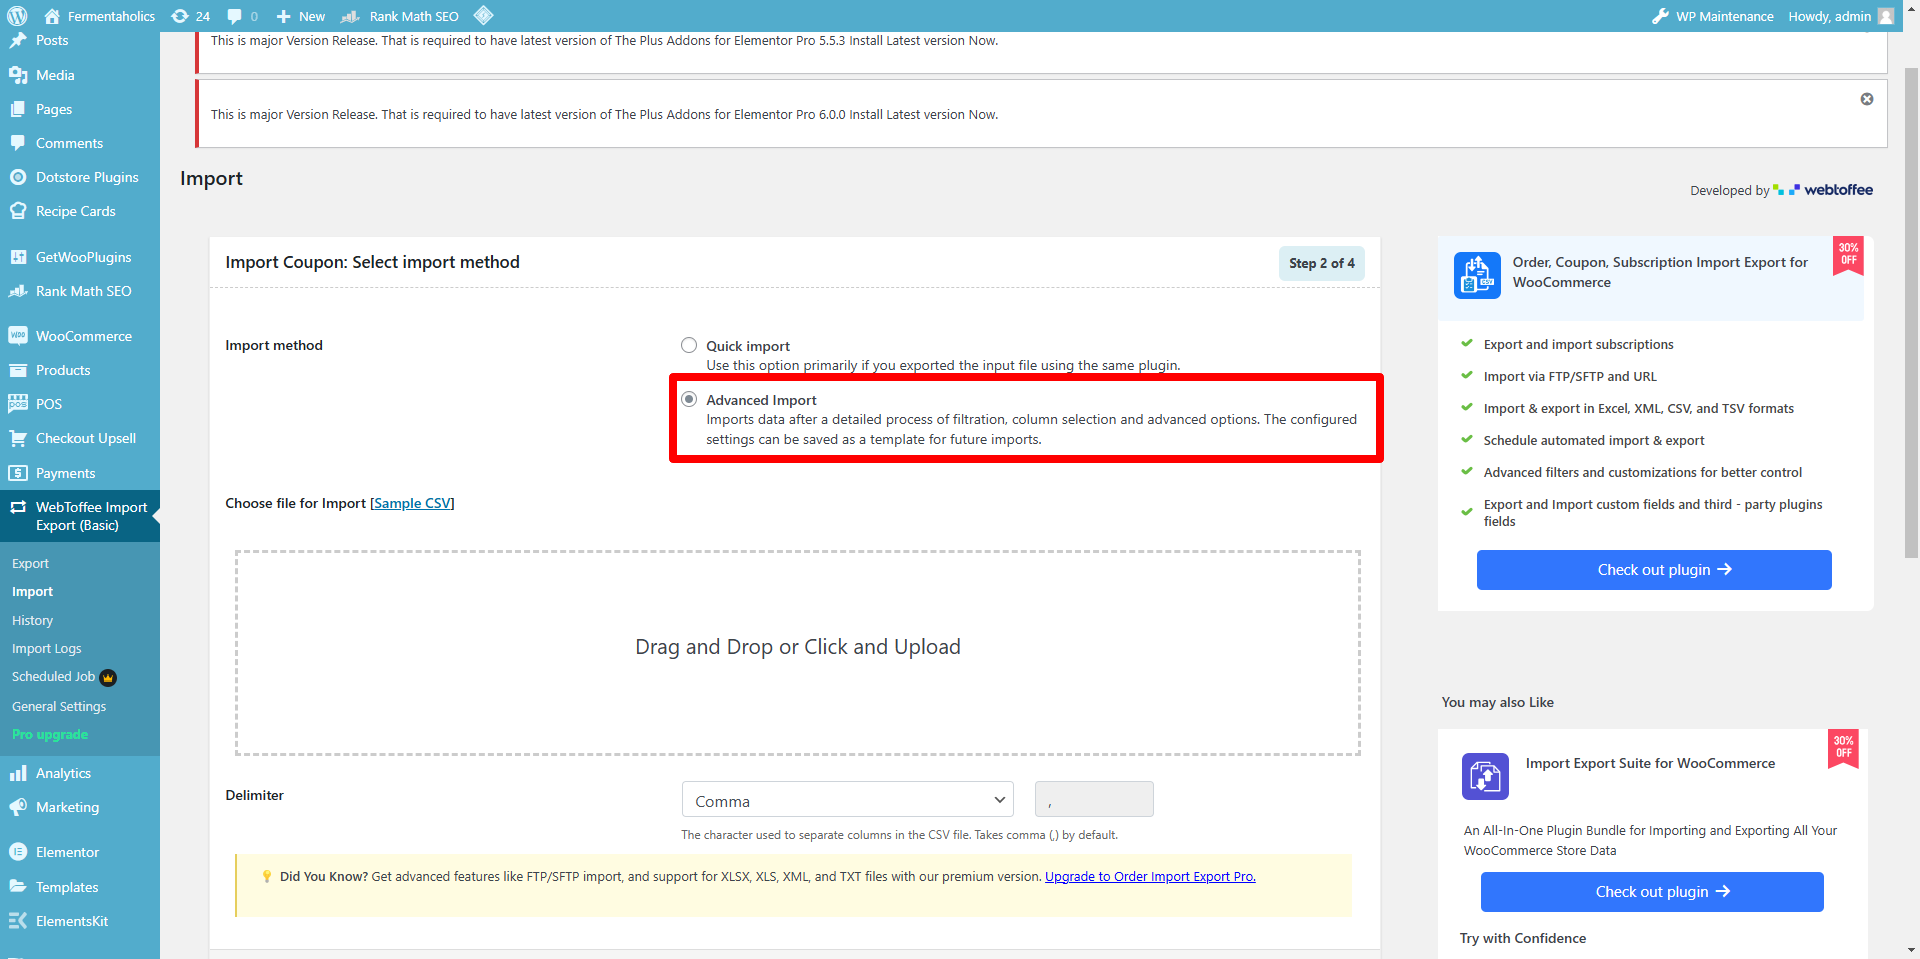
Select import from the web toffee import export and click advanced import proceed to the next stop
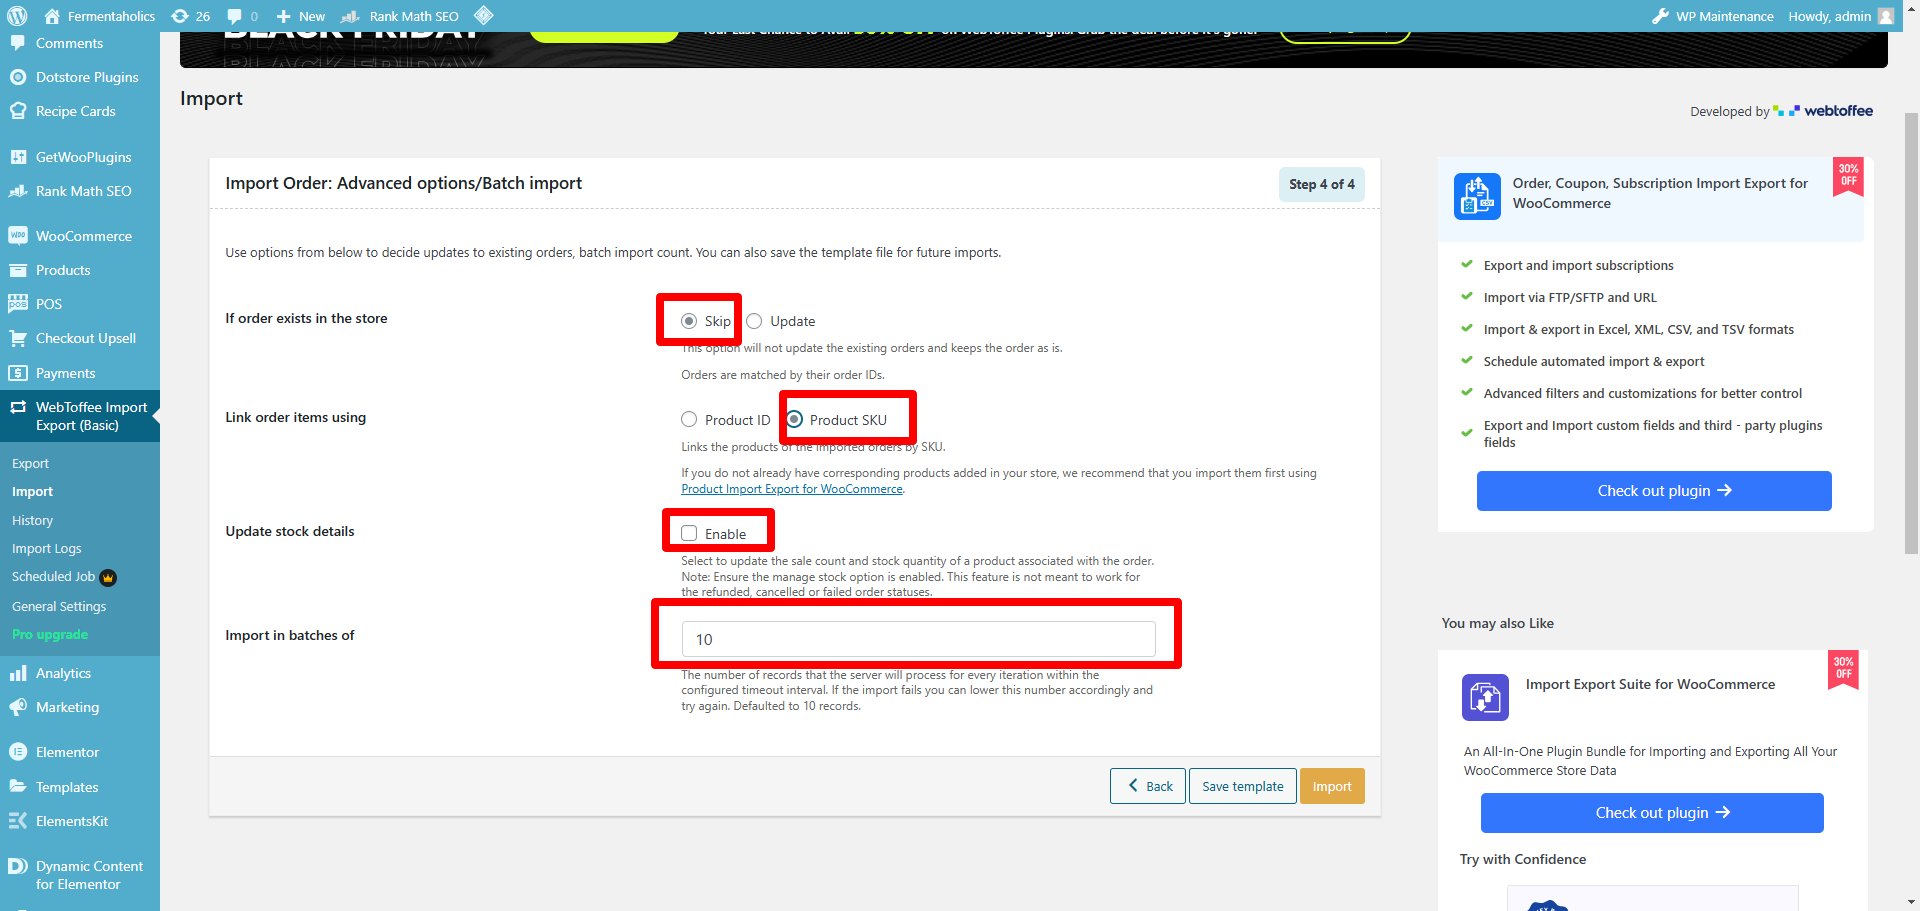
Last step before importing the orders it’s absolutely critical that you get these settings right every time if you make one error in this you’re going to have to go back and delete every single duplicate order this is also relative to ID and Order ID if one or two of these things goes wrong you’re going to have to delete and spend an hour cleaning it out and then go through the process again anything goes wrong or an error is made it will cost you hours upon hours of your day as a side note
you will select if what are exist skip link orders by product SKU because the IDS of products are not the same on staging in live don’t enable inventory we learn that today that is November 27th and important batches of 10. in my experience importing at a higher level will cost failure and you’ll have to rerun the import and that will cost you hours cleaning up duplicate orders and deleting them and rerunning the Imports
Lorem ipsum dolor sit amet, consectetur adipiscing elit. Ut elit tellus, luctus nec ullamcorper mattis, pulvinar dapibus leo.
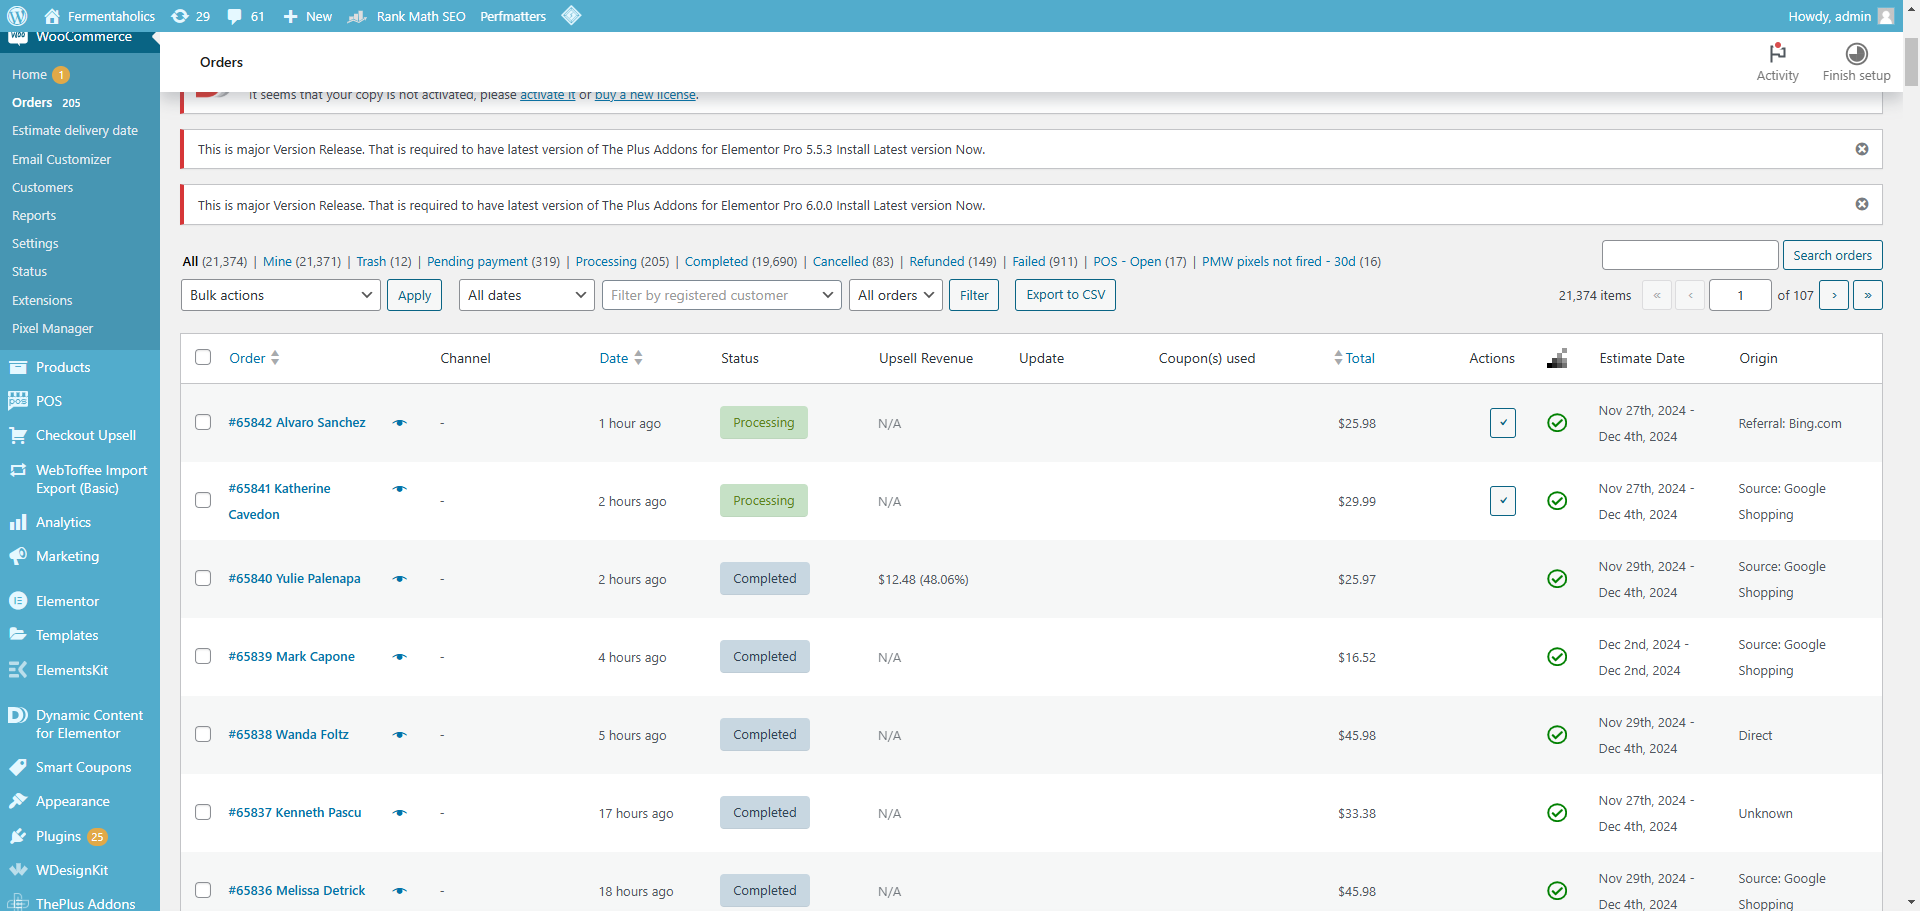
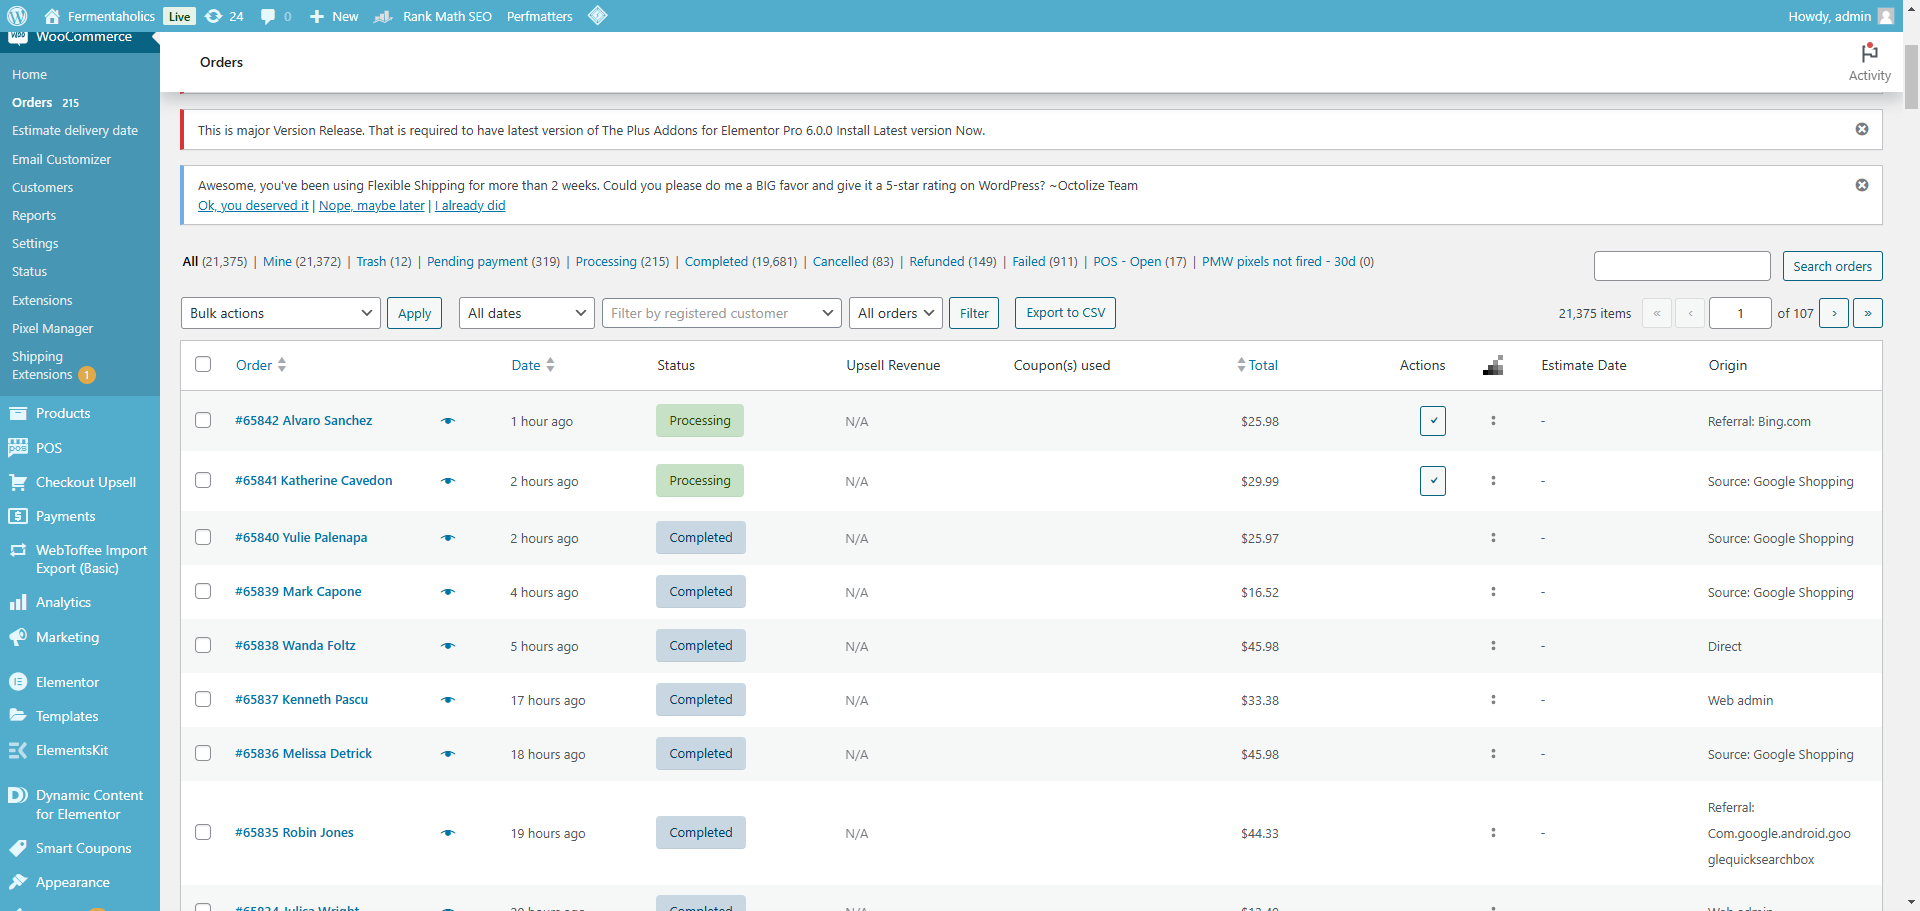
Upon successful completion you should have the exact same number as try to import and exported with zero skipped or something very similar and that’s how you know that the import ran successfully if you have 10 or 15 items or something like that it’s almost guaranteed that something went wrong and that you’ve missed something in the steps above exactly as listed

At this point the final phase of the import you want to double check staging to live I feel it’s best to put them on split screen and roll back to the actual date of the last push from staging to Live, in this case staging to life took place on November 5th so I rolled back to November 5th and I start looking at the line items and making sure that they’re moving up sequentially after you get through about 10 or 15 line items you can scroll up 30 and if the orders are still matching up number wise to skim to the top and I find it to be fairly accurate especially if you didn’t skip any orders this is based on trial and error you don’t have to be too surgical as long as you don’t see anything breaking before this.
*At this point I make a backup of the site with All In One WP migration just in case there are issues with staging to live
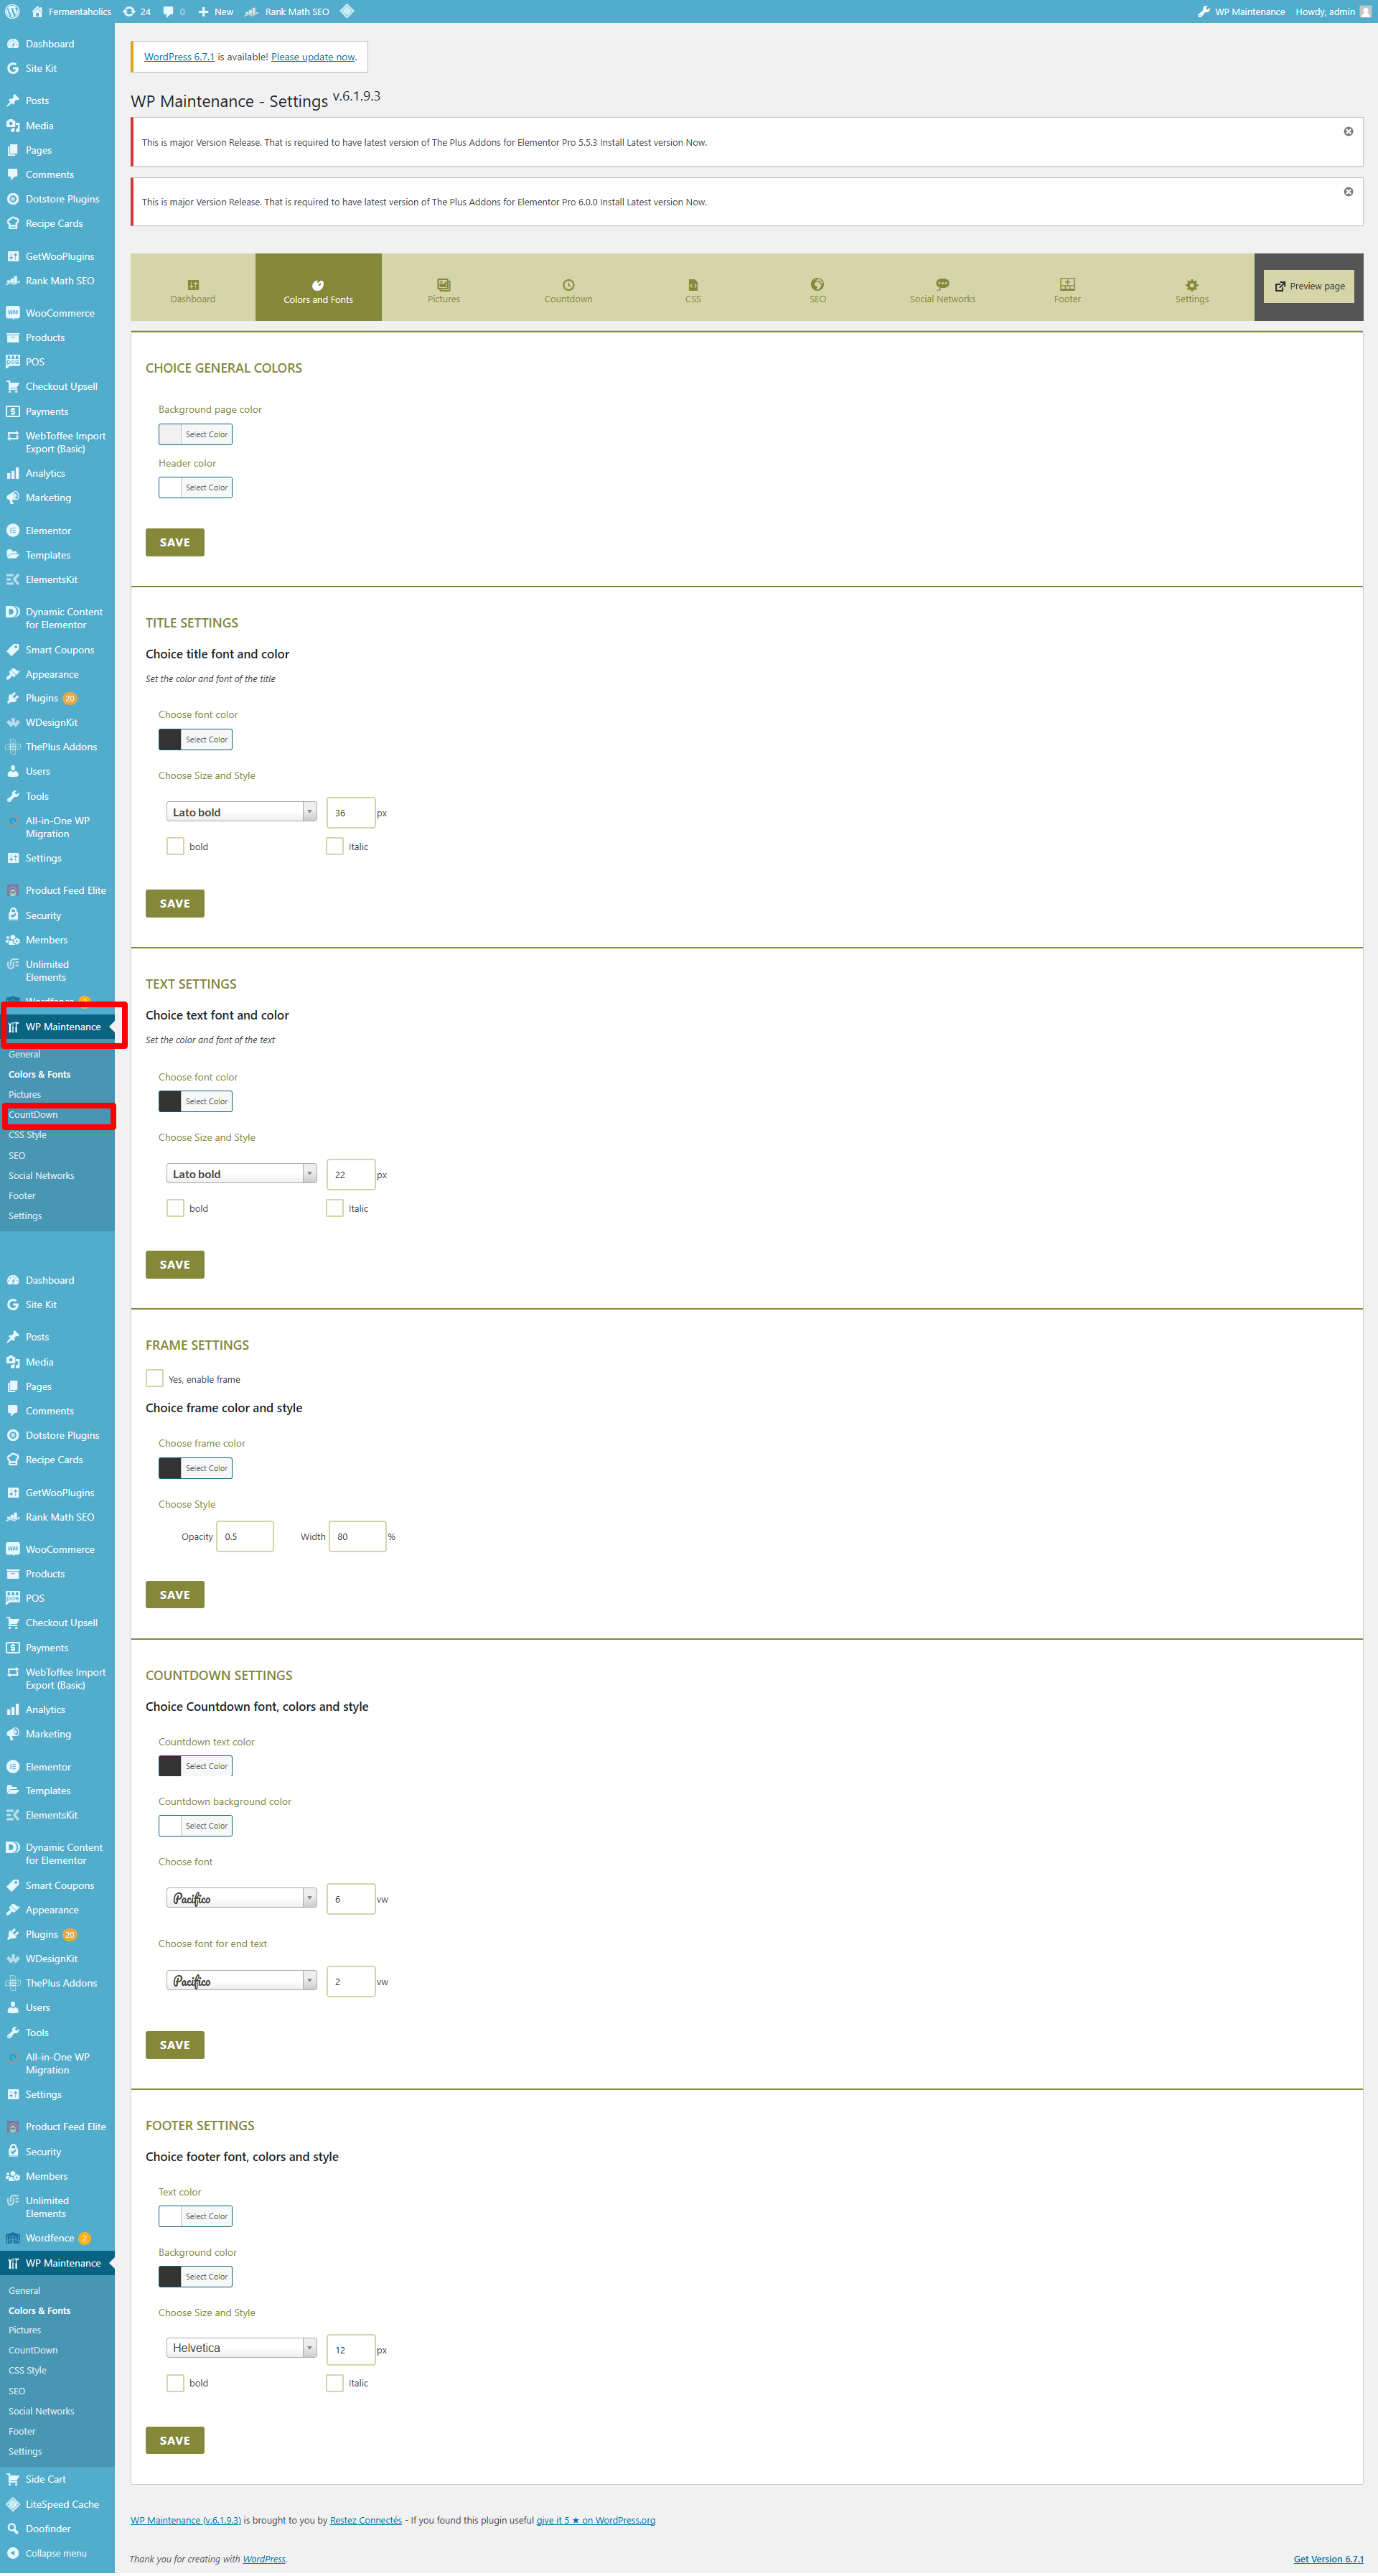
Enable maintenance mode follow the directions on screen all you have to do is go to the dashboard enable the settings and then also go to the countdown and set the timer at roughly 40 minutes from when you start to push staging to live that will set up your maintenance mode and give your customers an idea of when you’ll be back online
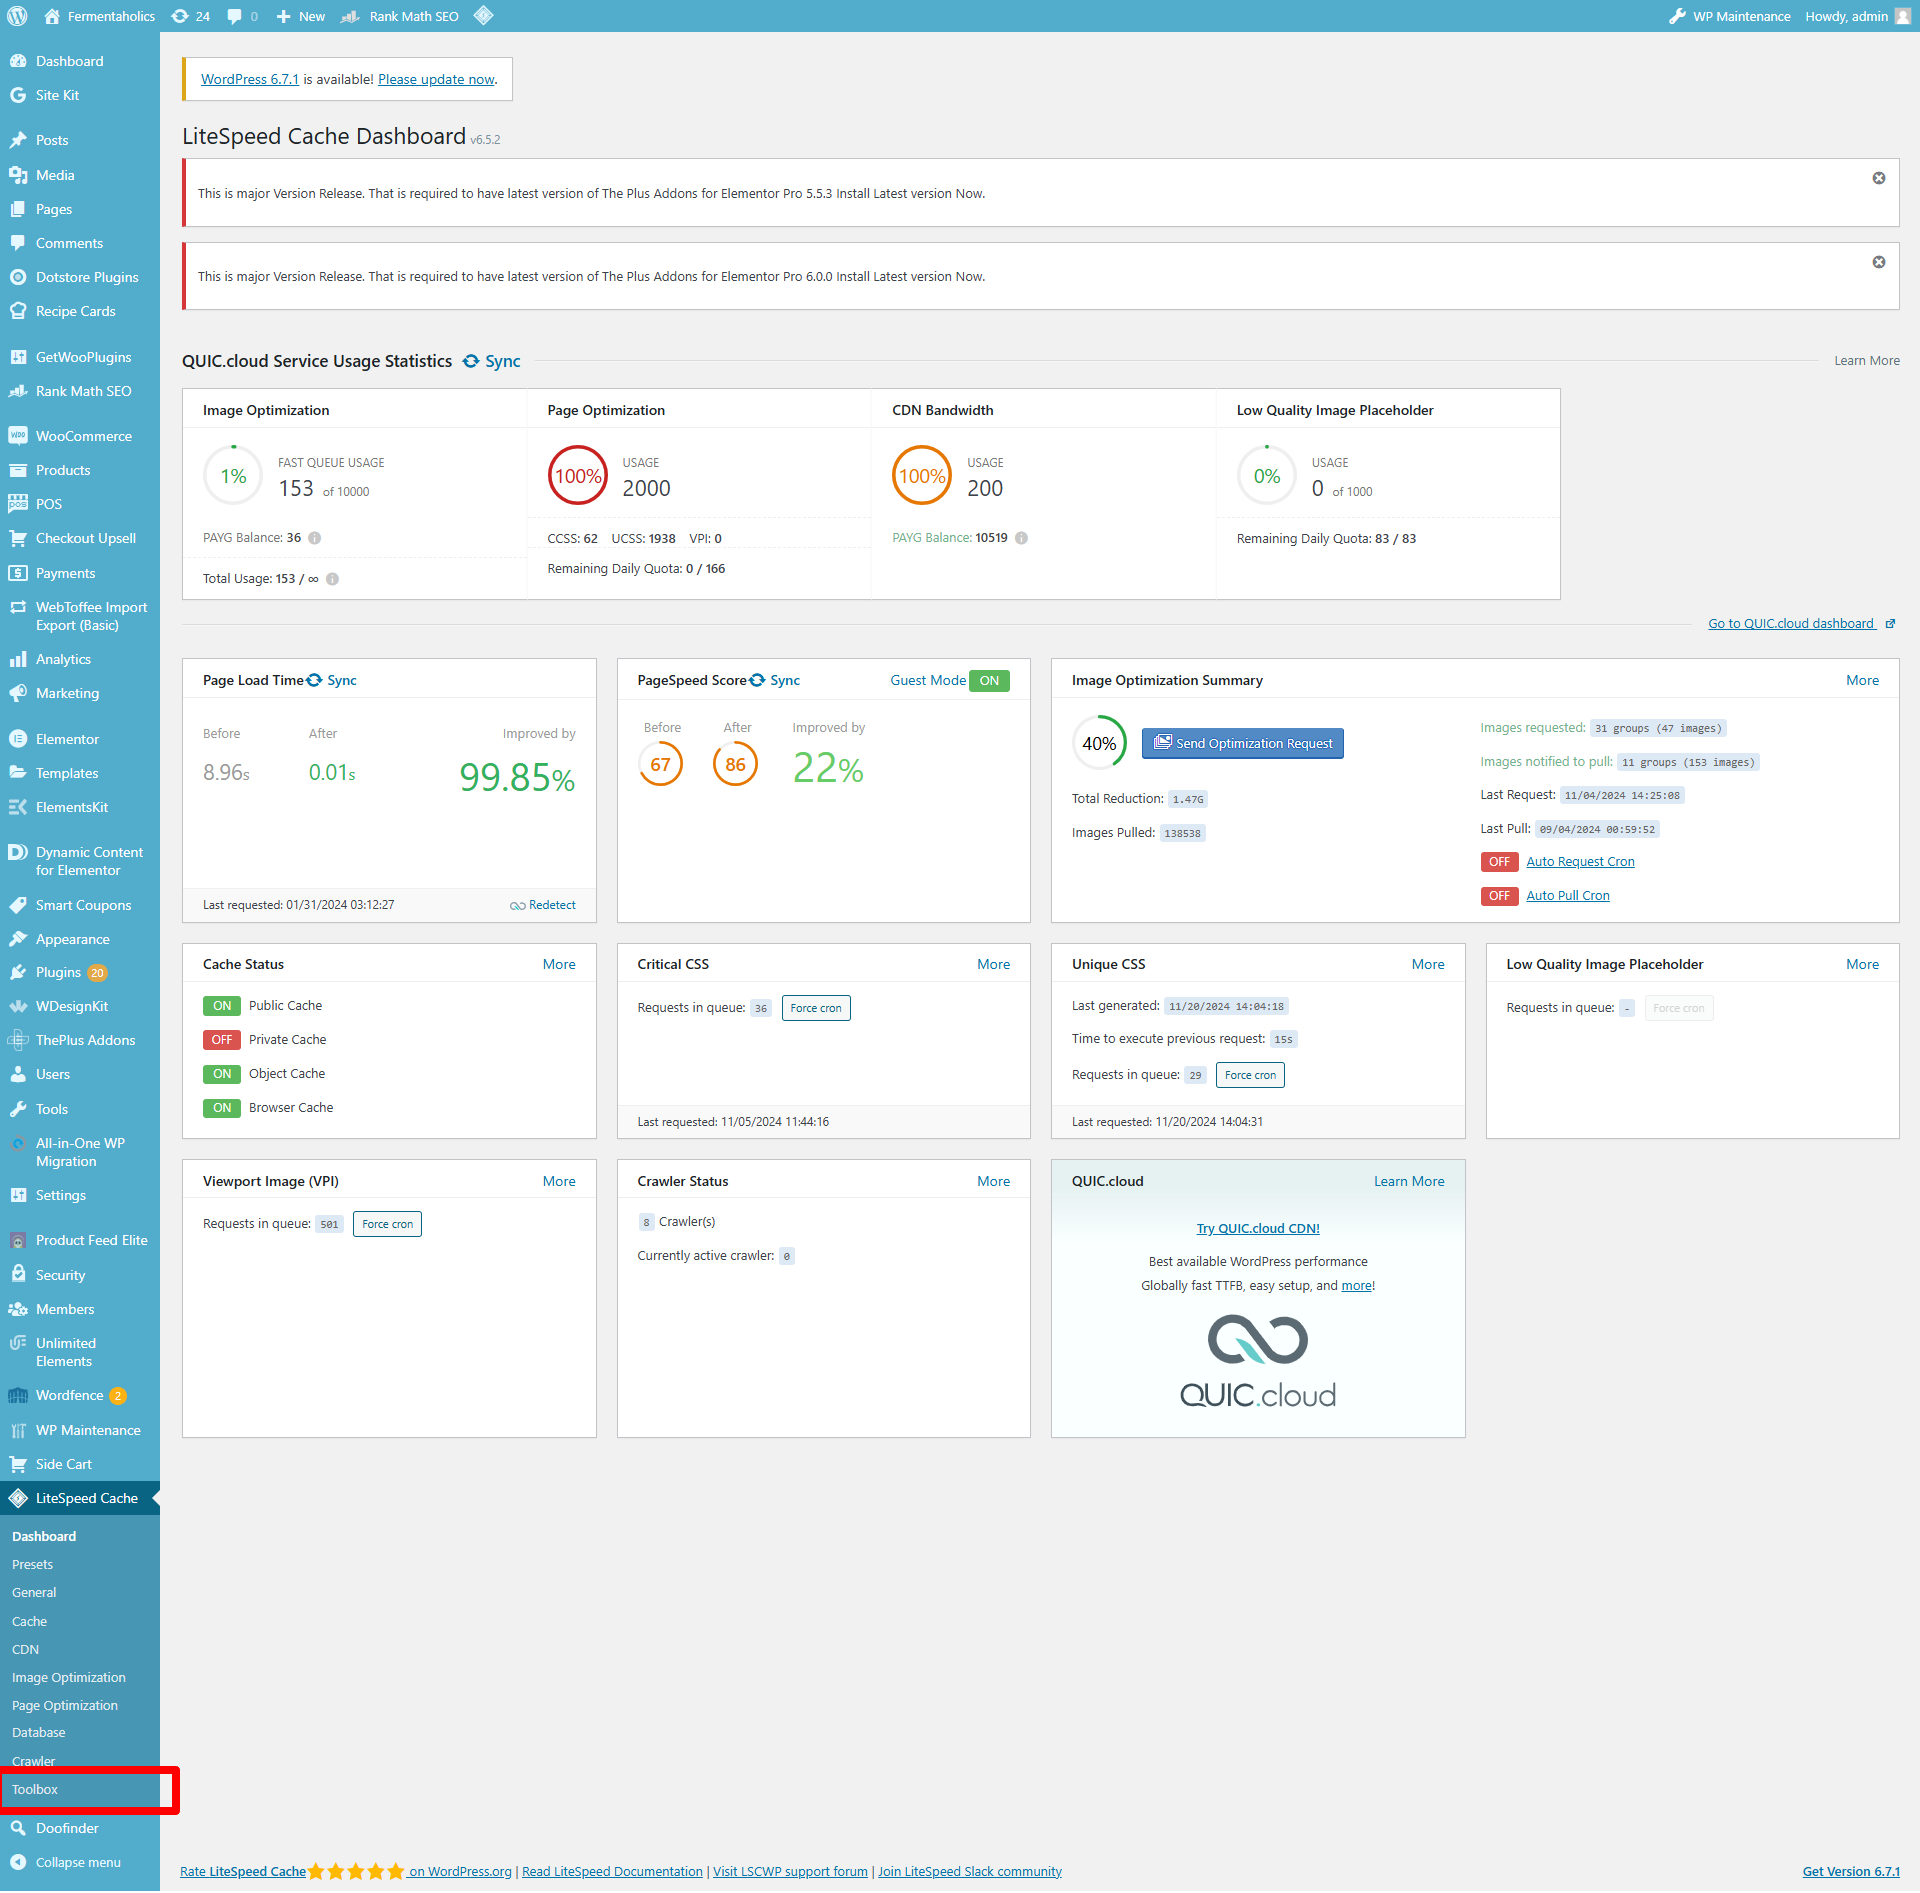
Next you’re going to go to lightspeed cash and select toolbox what we’re doing here is turning on debugging so that the Cash System turns off and the maintenance mode screen appears instantly otherwise you will get errors some visitors will still be browsing on the cash and you know new visitors will arrive at maintenance most causing confusion
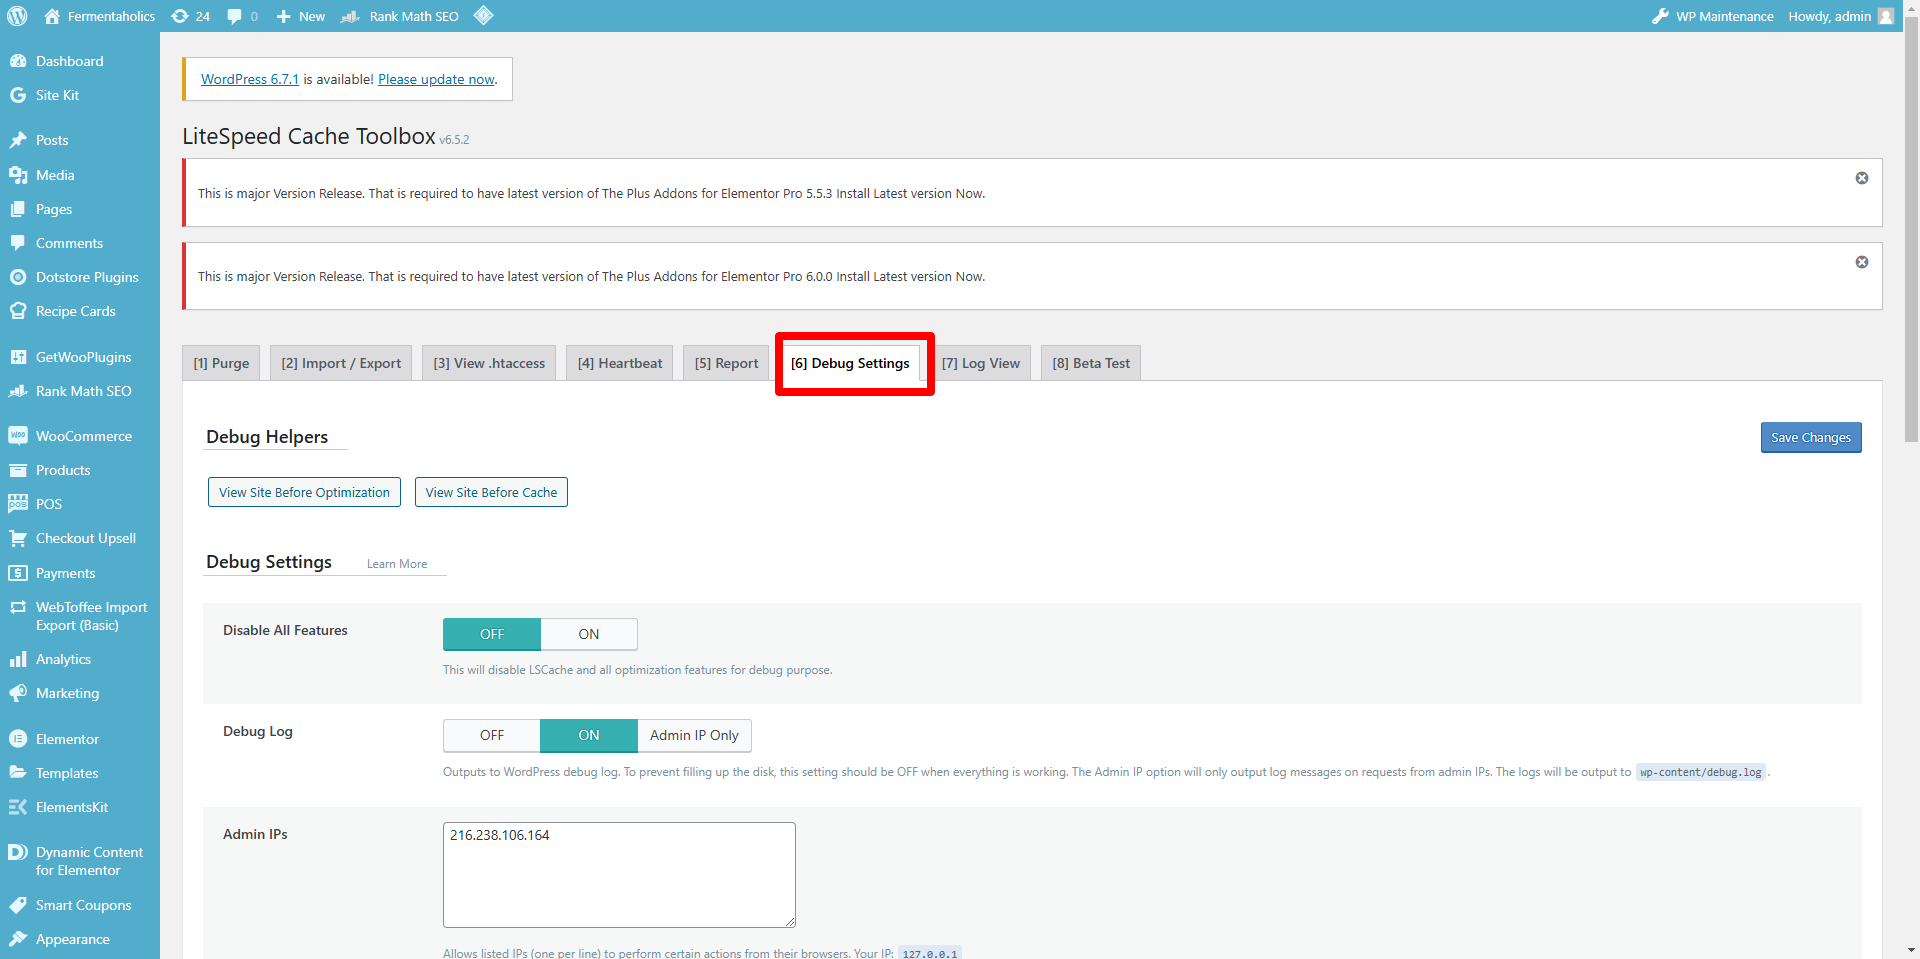
next we select debug settings
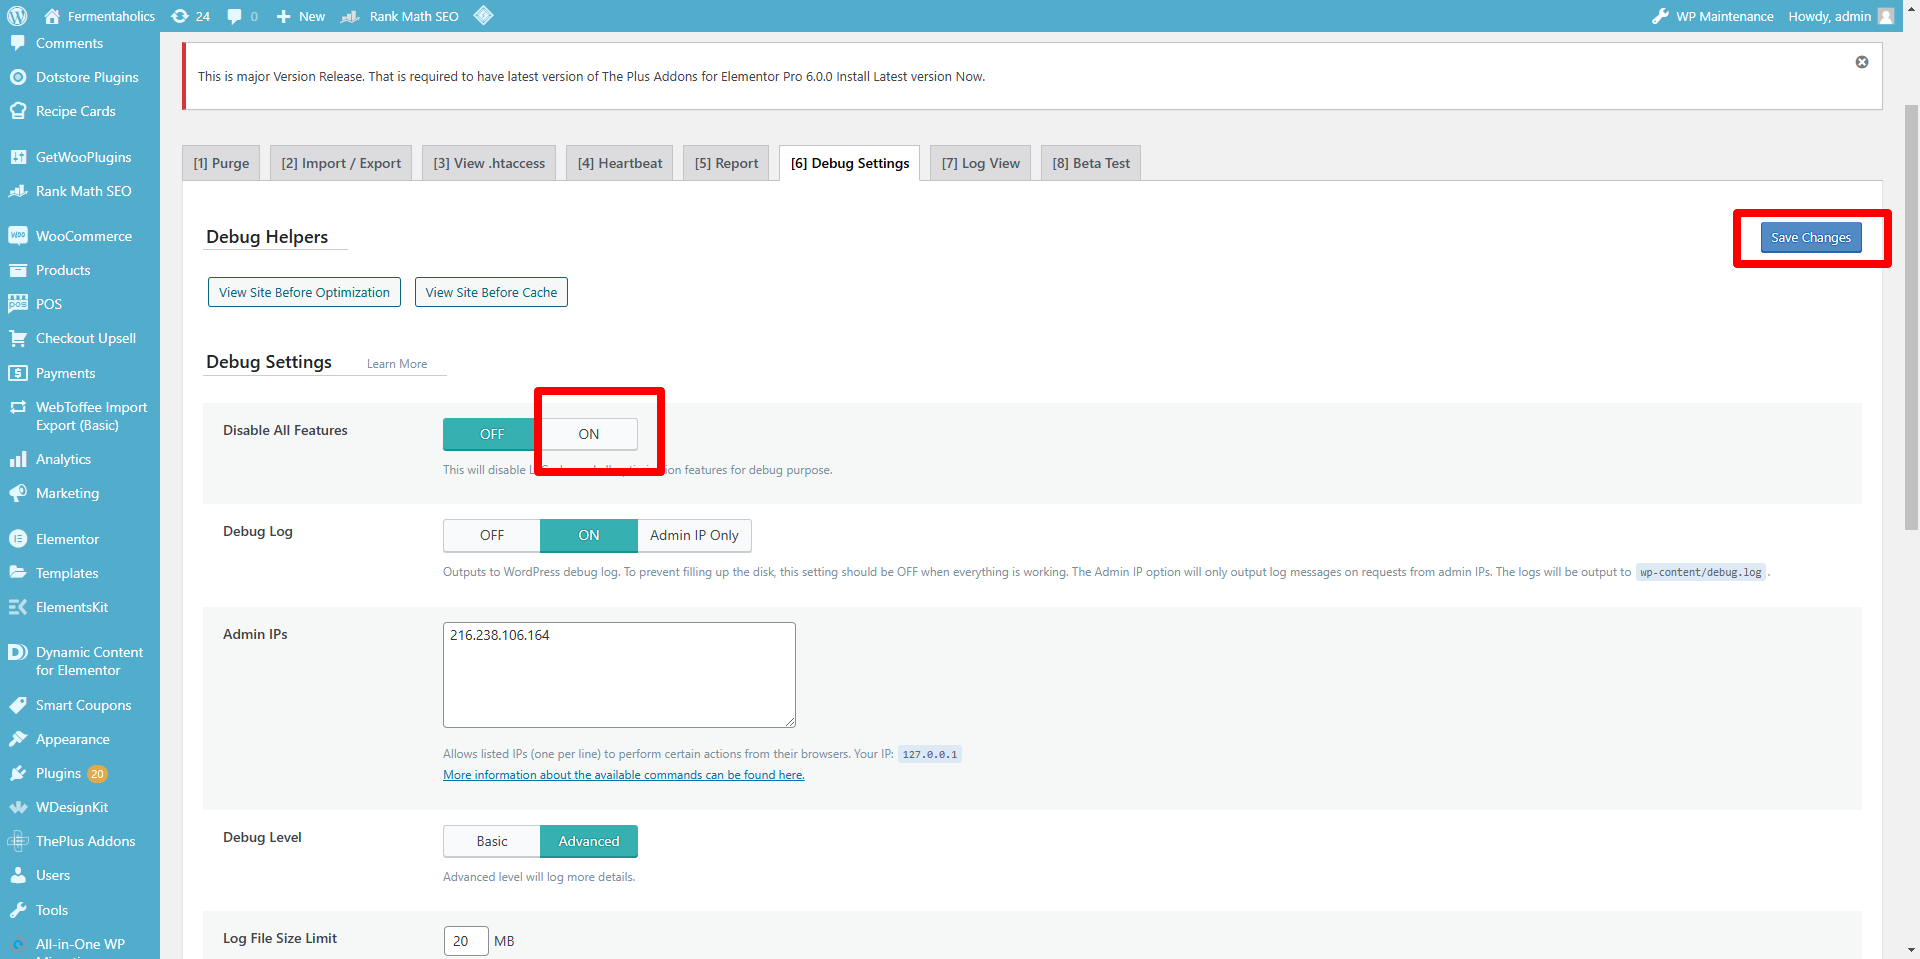
and on debug settings disable all features on
From this place you’ve completed all the steps you need in order to successfully push staging to live without errors or riding over orders or making problems that we’ve already faced 10 times in building out this workflow for you to do it yourself
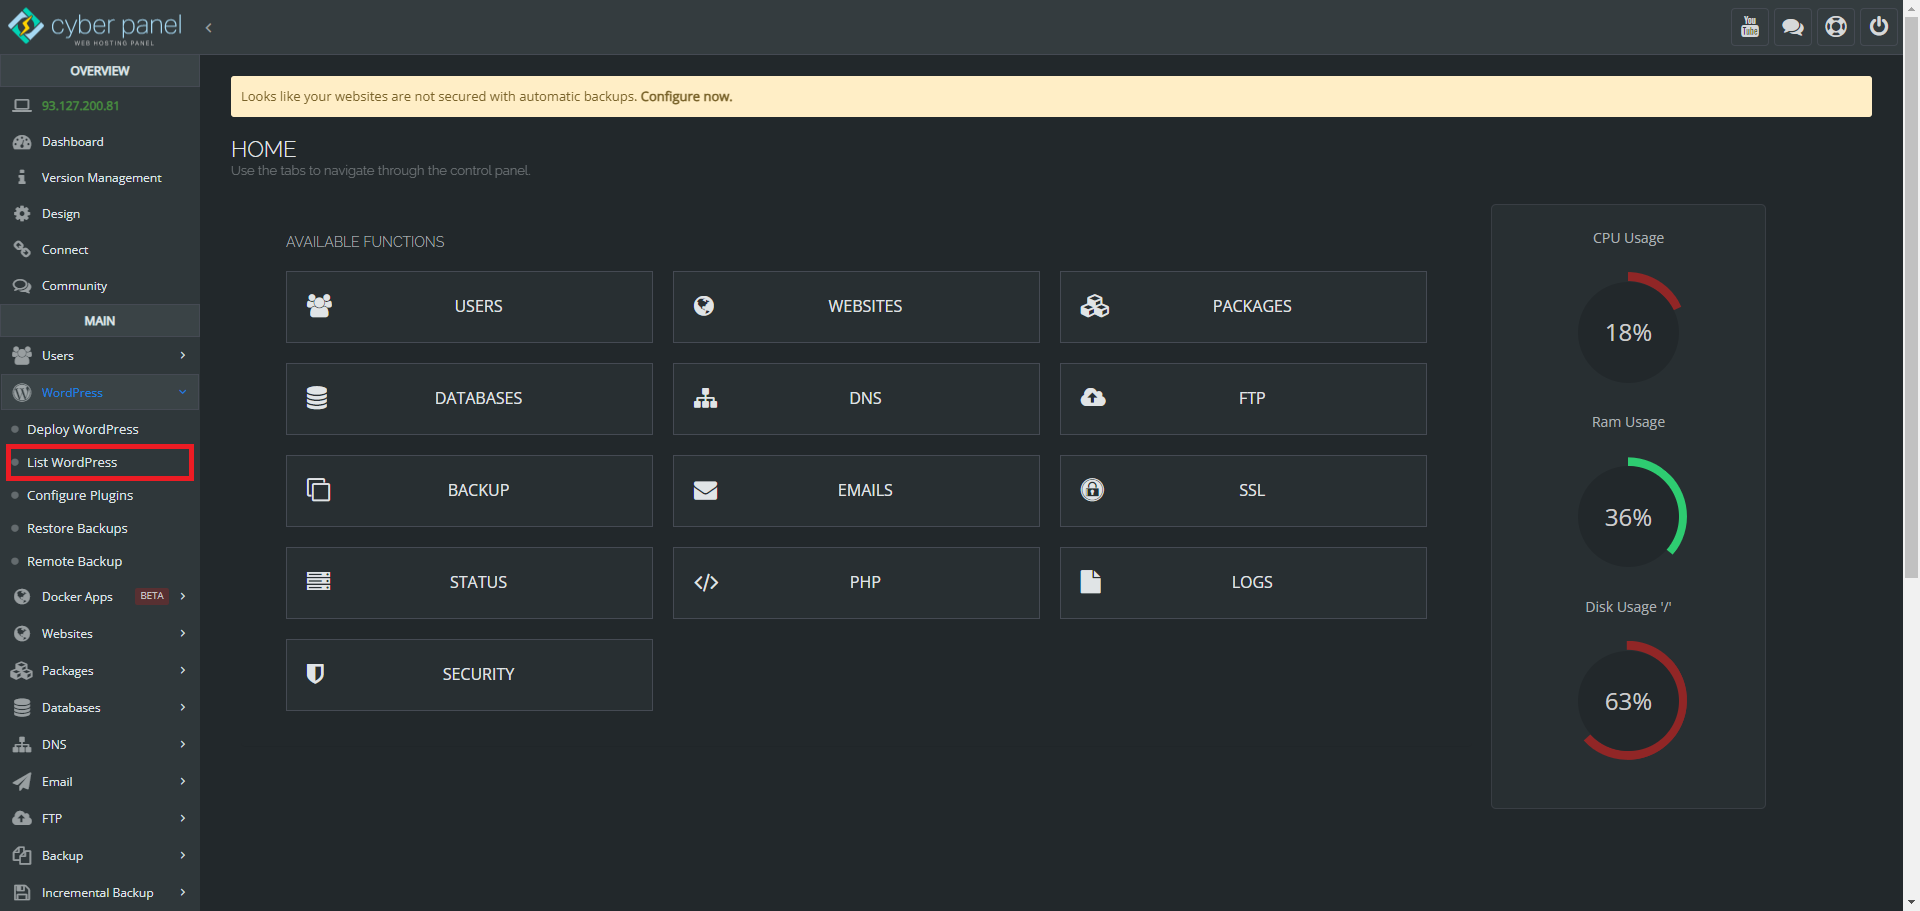
In The Next Step we’re moving over to the server side based on the IP address I believe you have the credentials but here’s the IP https://93.127.200.81:8090/
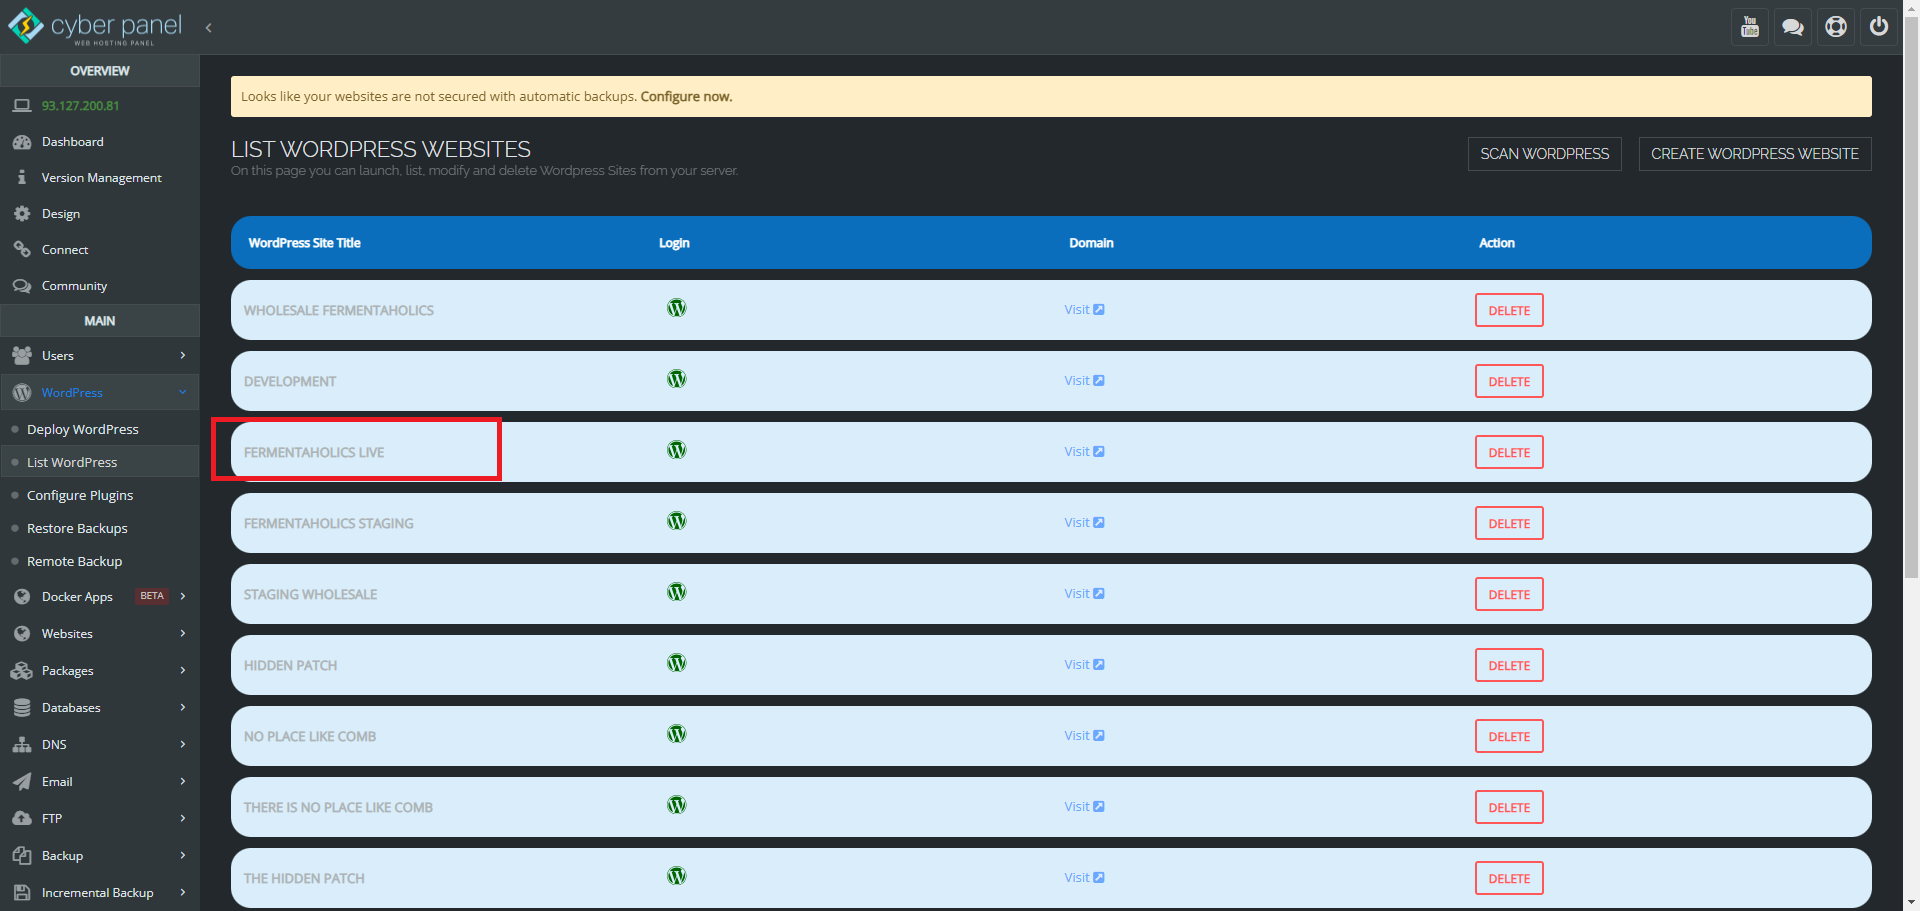
Select WordPress sites
Next Step locate for fermentaholics live click on the title
select staging in the tabs and then move to deploy to production highlighted in red
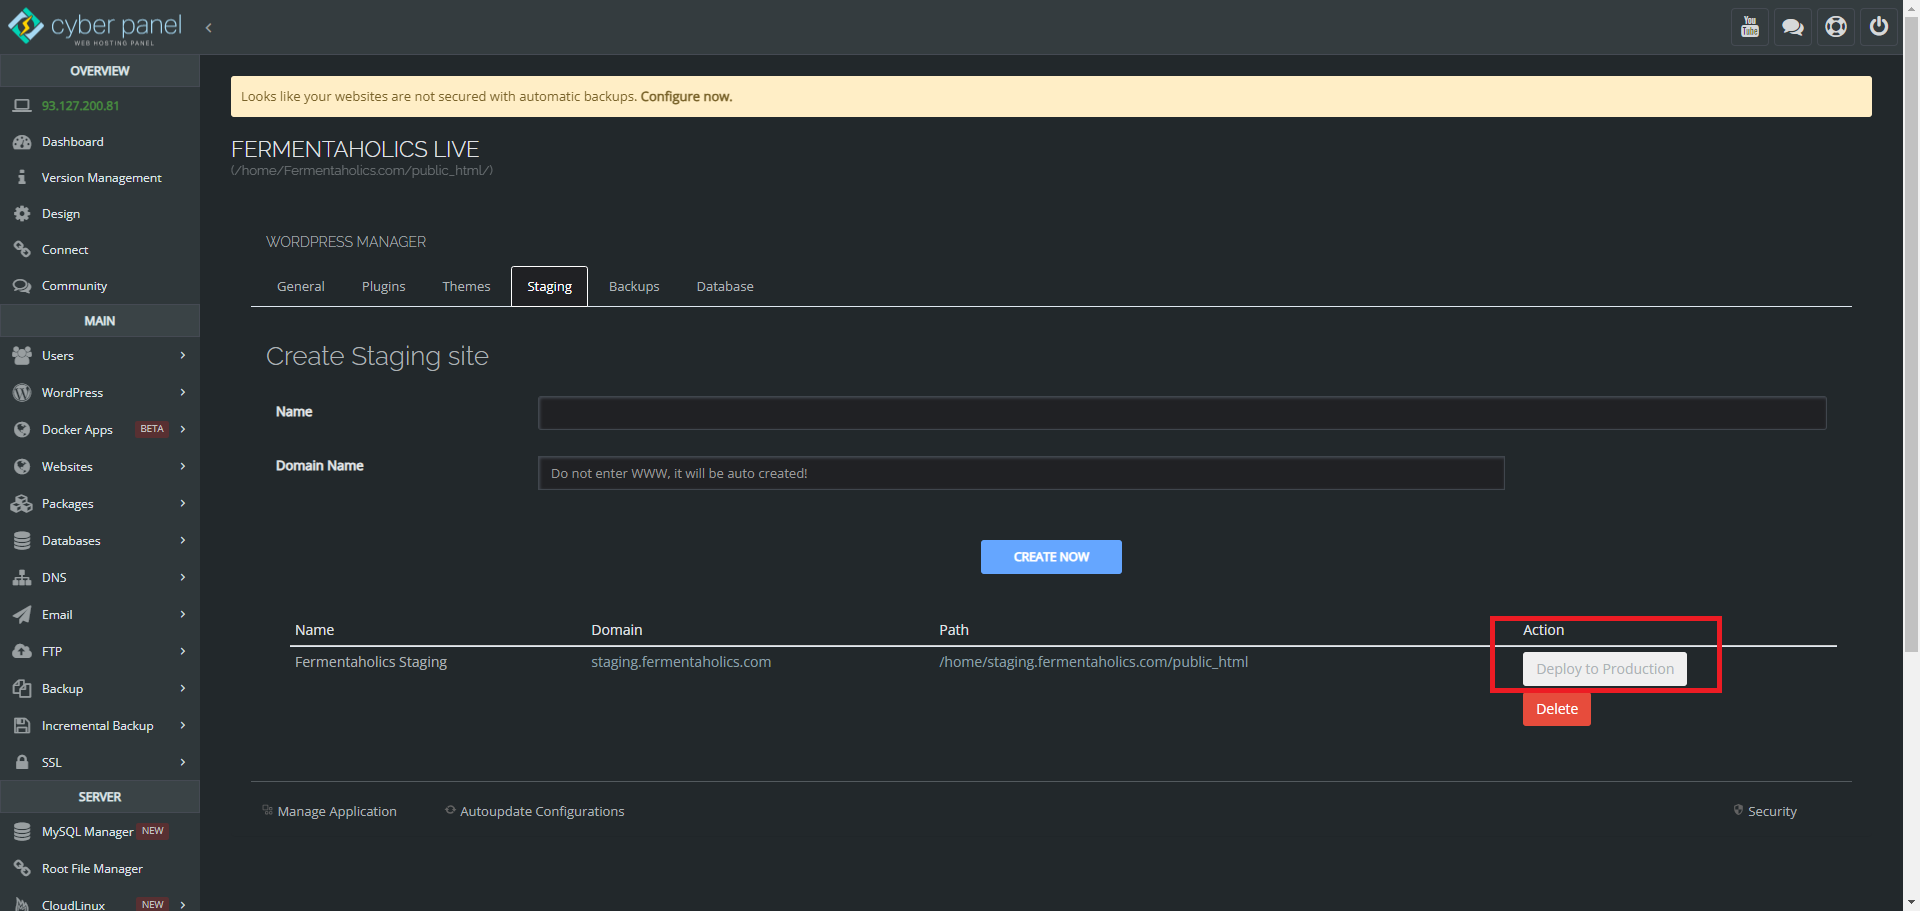
This process will take precisely 32 minutes from staging to live
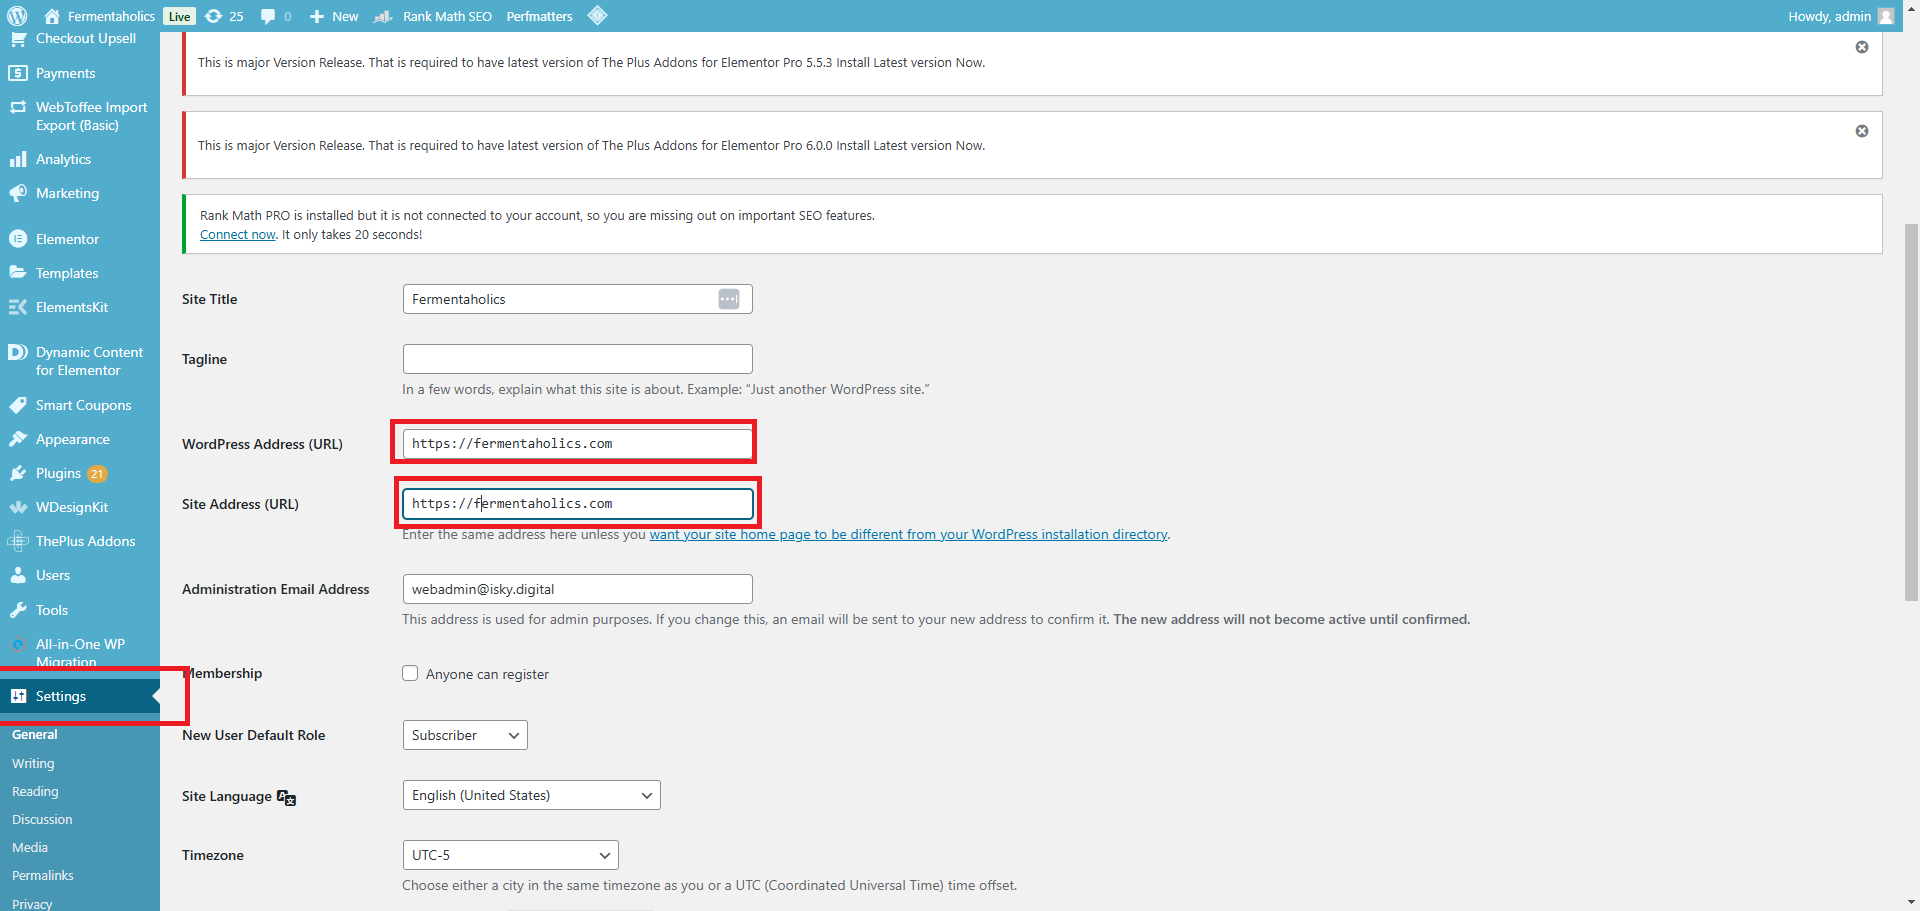
After completion there’s one critical step that you need to correct is that and the copy over the https reverts back to http and also there is a capital F in Fermentaholics.com you need to modify the HTTP to https:// and make the uppercase F a lowercase f in https://fermentaholics.com
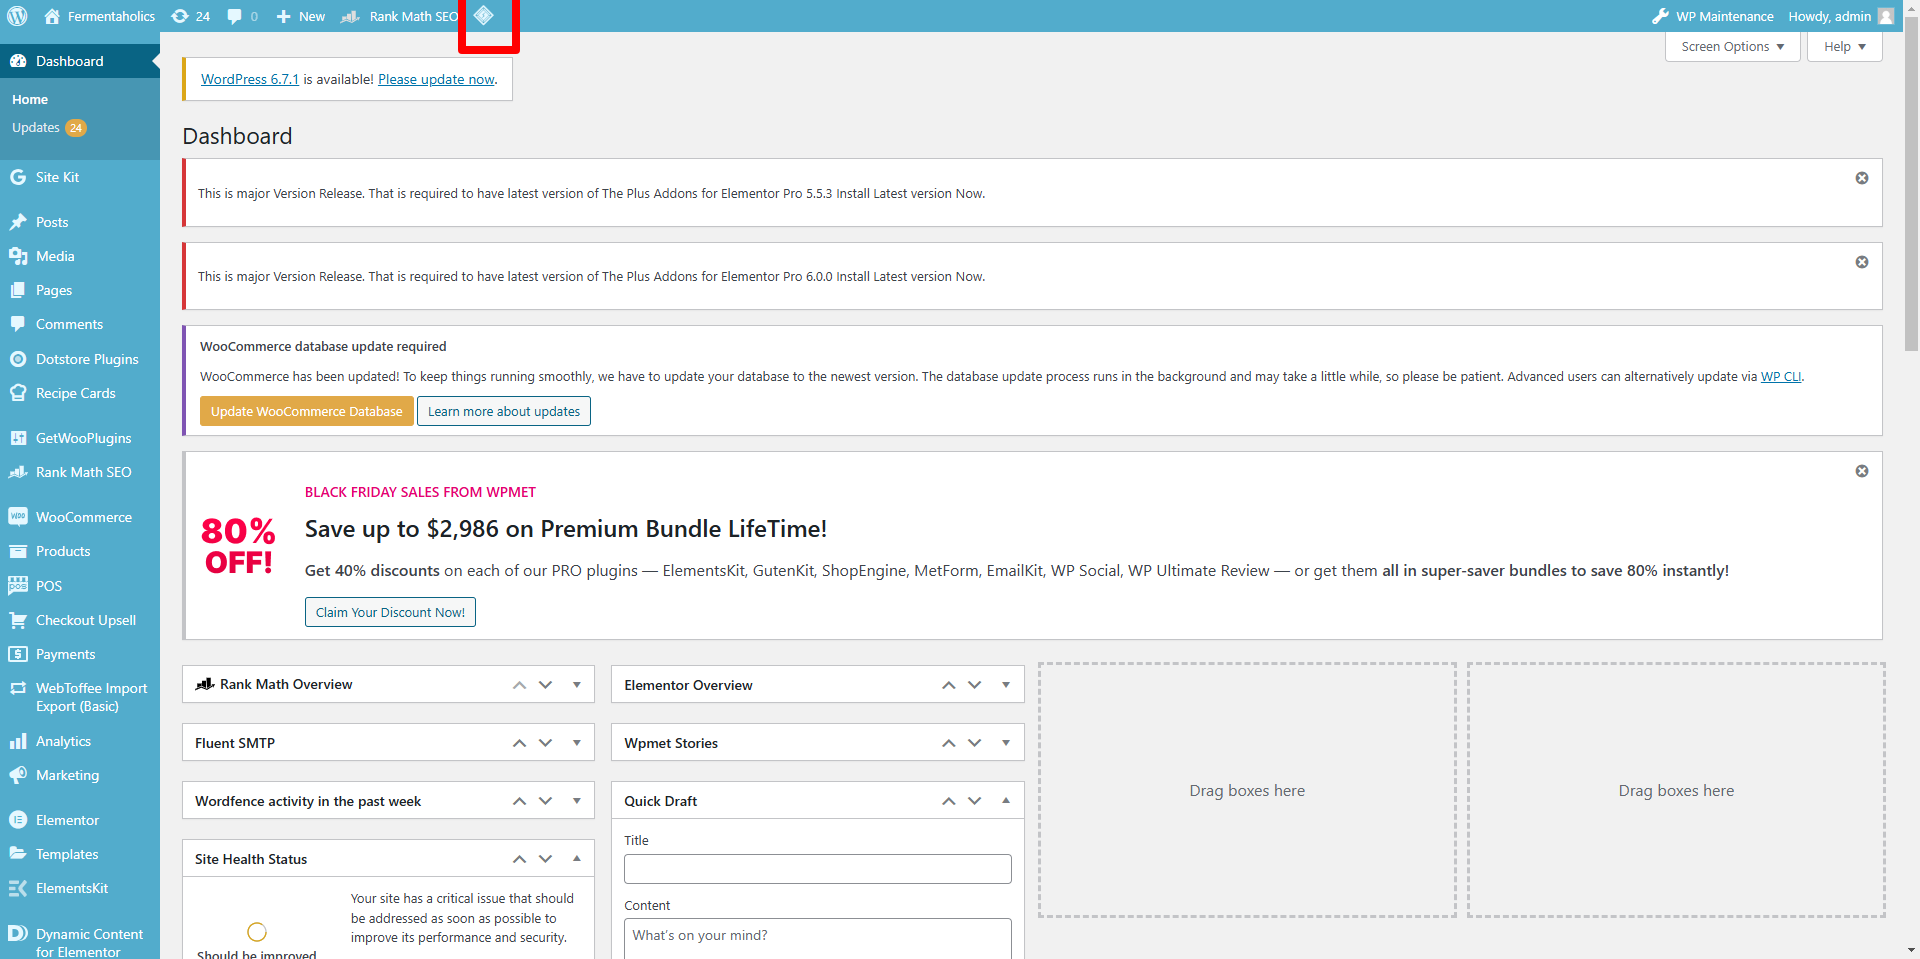
After the steps complete go to the top of the page get clear cache clear all and that should refresh your site completely what you’ll need to do from there is open an incognito browser and make sure the site is functioning as it should.
When you clear the cache the site just slow down for about an hour while it’s filling up the object and browser cash again but after that maybe an hour later side should be running at speed as well
Reconnect the obvious connections Klayvio doo finder and listing mirror and from there you’re good to go
If you follow these steps exactly to correctly you should not have any issues pushing staging to live and I will no longer be needed from this point…you’re welcome, good luck!